Thursday, December 30, 2010

Cookies that contain candy.

OK so I know the holidays are almost over and most of you are sick of sweets, but I had to share a couple of cookie recipes that I made this Christmas season before I forget about them. Incidentally, both of these would be a good way to use up some of that candy you got in your stocking if your haul happened to include candy cane kisses or Rolos (neither of which are that great when eaten plain, in my opinion).

Candy Cane Kiss Cookies (adapted slightly from ourbestbites.com)


(Image courtesy of Our Best Bites)

I made these cookies for a Christmas party with my high school girlfriends and they were a hit. Since then I’ve made them using both the shortening and butter mixture the recipe recommends and just butter alone. I have to say I prefer the butter, since shortening freaks me out a little and it didn’t seem to make that much difference in the texture of the cookie.

1/2 c. butter-flavored shortening
1/2 c. real butter
OR
1 cup butter

1 c. brown sugar
1 c. white sugar
2 eggs
1 1/2 tsp. vanilla
1 tsp peppermint extract
1 tsp. baking powder
1 tsp. baking soda
1/2 tsp. salt
2 1/2 c. flour, lightly spooned into measuring cups and leveled with a knife
1/4 c. + 2 Tbsp. unsweetened cocoa powder
1 1/2 c. dark chocolate chips (semi-sweet)
48 Hershey's Candy Cane Kisses, unwrapped

1) Preheat oven to 350.
2) Cream together softened butter, shortening, brown sugar, and white sugar for 1-2 minutes on medium-high speed or until light and fluffy.
3) Add the eggs and vanilla.
4) Meanwhile, combine the baking powder, baking soda, salt, flour, and cocoa powder. Add to the butter/sugar mixture and mix until combined. Mix in the chocolate chips.
5)Drop the dough by the tablespoonful onto an ungreased baking sheet. Bake for 8-10 minutes, or until the centers are set but still soft.
6)Remove from oven and allow to cool for 1 minute. Top each cookie with an unwrapped Candy Cane Kiss. Allow to cool completely, long enough for the Kiss to harden. If necessary, after the cookies have cooled, they can be placed in the refrigerator or freezer to re-solidify the Kiss


Rolo Cookies (from the Ivory Favorites cookbook)

I originally bought Rolos intending to make an entirely different treat, but after finding out that peanut butter is literally the only flavor of M&Ms not available in holiday colors (a fact that seriously baffled me) I had to put the kaibosh on that idea. These cookies were a more than adequate substitute.

2 1/2 cups all purpose flour
1 teaspoon baking soda
1/4 teaspoon salt
3/4 cup cocoa
1 cup butter, at room temperature
1 cup granulated sugar
1 cup ligh
t brown sugar
2 eggs
2 teaspoons vanilla extract
Bag of Rolo candies, unwrapped
2 Tbsp. sugar for rolling the cookie dough balls in (optional)

1. Preheat oven to 375 degrees .

2. In a medium bowl combine flour, baking soda, salt, and cocoa. Set aside.

3. With a mixer, cream butter and sugars together until smooth.

Add eggs and vanilla and mix well.

4. Slowly add flour mixture to sugar mixture and blend well.

5. Using your hands, shape dough into small balls (mine were about the size of a ping pong ball, maybe a little smaller).

6. Press Rolo into center of ball and cover with dough.

7. Roll dough ball in sugar ( I skipped this step because I’m not a fan of that sugary texture) and place on an ungreased cookie sheet.

8. Bake cookies for 8-10 minutes, until tops of cookies are slightly cracked.

9. Remove from oven and let sit on cookie sheet for 3-5 minutes. Move to a cooling rack and cool completely.

Tuesday, December 14, 2010

White Chili

Is there a better winter dinner than warm, hearty soup? I made this one for a Jazz party and a friend asked for the recipe. Hansol, this one's for you:

White Chili

2 tablespoons oil (the recipe recommends vegetable but I use olive)
1 medium onion, finely chopped
2-3 chicken breasts, cooked and shredded
1 (9 oz.) package frozen white corn (preferably shoepeg)
1 large clove minced garlic
2 (15 oz.) cans Great Northern beans, drained and rinsed
2 cans chopped green chiles
1 tsp. salt
1/2 tsp. cumin
1/2 tsp. oregano
1/2 tsp. coriander
1/4 tsp. cayenne pepper
3 cups chicken broth
3 tablespoons lime juice

Garnishes (optional):
Sour cream
grated cheese
tortilla chips

1) heat oil over medium heat in a large pot. Add onions and garlic and saute for about five minutes until onion is soft and translucent.
2) Add remaining ingredients and stir to combine. Bring to a boil, then let soup simmer for 20-30 minutes.

Wednesday, December 8, 2010

A roundup of Thanksgiving desserts

OK, I know I probably should have gotten around to posting this sooner, before it was almost Christmas and you all still had Thanksgiving on the brain, but I am nothing if not the queen of procrastination. I am also the queen of stealing good ideas, so after years of hearing about people having pie parties the night before Thanksgiving in order to more fully enjoy the dessert portion of the holiday meal, I finally got my act together this year and had one of my own.

I’m not too big on pies, and I figured that most people would get their fill of them after Thanksgiving dinner, so instead I called my function a dessert party, and it was really just an excuse for me to bust out all the autumnal baked goods recipes that I’d had bookmarked for months but never made.

The party itself turned out to be quite fun, and, in my opinion, a perfect way to spend the night before Thanksgiving. It consisted of an assortment of friends and family dropping by to eat and mingle, with the Jazz game and baby Anna providing ample entertainment. On a cold, snowy night, our house felt warm and cozy as it was packed with people. This gathering might just have to become a tradition.

Of course I failed to take a single photo that night, including one of the dessert table. Luckily I found all of the recipes I made that night on the internet, so I’ve posted the links to the recipes (along with beautifully styled food photography that you sure won’t find on this site) and included my opinion of them, along with any changes/adjustments I made.

Pumpkin Brownies (via Smitten Kitchen and marthastewart.com)
I found this recipe on Smitten Kitchen, but the original can be found on Martha Stewart’s site. The Smitten Kitchen version reduces the amount of sugar in the recipe, which I’m thinking is a mistake. As much as I normally like my desserts on the subtle side, this one could have used a little more sweetness.

Overall, though, these were very good. Moist, dense, and a great take on the pumpkin/chocolate combination. I did make them in a 9X13 pan instead of the recommended 9x9 (which I would suggest doing unless you like your brownies really thick) and if I were to make them again I would probably drop the final pumpkin layer onto the chocolate batter in big spoonfuls, then swirl in with a butter knife, rather than just pouring it on. I’m thinking I would get a better marbleized effect this way.

Pumpkin Bread Pudding (via foodnetwork.com)
Thing is, I love the flavor of pumpkin but hate the smooth, gooey texture of pumpkin pie. When I saw this dessert on an episode of Throwdown with Bobby Flay I knew it would be a perfect nontraditional take on the flavor of the season. It turned out delicious.

I skipped the caramel apple sauce on this one, and, due to a stove burner that likes to lie about its temperature, curdled the freaking crème anglaise. After losing my mind a little over the fact that I had just wasted a ton of egg yolks and a pricey vanilla bean, I set about googling ways to remedy the situation. I read through a bunch of complex solutions that would have been impossible given the temperamental state of the aforementioned stove before coming across a suggestion to just throw the sauce in a blender. Miraculously enough, it worked. A few whirls in the blender turned a curdled mess into a sauce as silky and creamy as any crème anglaise I’ve ever had. Thank goodness for the internet.

Other changes: left the bread out to dry the night before instead of toasting it, omitted the bourbon.

Pumpkin Cheesecake (via Smitten Kitchen)
Ah, the dessert that took 5 years off my life. After baking this cheesecake for ten minutes longer than the recommended time, the thing still jiggled like crazy. I gave it ten minutes more, then spent the next few hours obsessing over whether or not it would set. Luckily it did, and ended up looking exactly like the photos on the website. Crisis averted.

This cheesecake was good in terms of flavor, but I think I would like the filling to be a little more dense. Or maybe I did just underbake the thing. Who knows. I left the bourbon out of this recipe as well.

Rustic Apple Tart (via marthastewart.com)
I’m always looking for new apple desserts and this one seemed like a good variation on the traditional pie. I actually never got to taste this tart, as it was gone before I had a chance to, but everyone that tried it said it was good. However, if I had found it earlier I think I would have tried the Pioneer Woman’s approach to this dessert, as it seems infinitely easier and results in no pieces being left without those delicious puffed edges. Leave it to Martha to make things complicated.

Pecan Chocolate Pie (via She Wears Many Hats)
This was a “filler” dessert that I quickly threw together because I had all the ingredients and wanted to add something more traditional to the spread. I’m not a huge fan of pecan pie, but those that are said this one was great. Although the recipe doesn’t state this, I would recommend covering the edges of the pie crust in tin foil for all but the last twenty or so minutes of baking time. Oh, and in case you haven’t noticed a pattern already, my version of this pie was bourbon-free.

Baked Brie with Red Pepper Jelly (via Our Best Bites)
Ok, so I know this isn’t a dessert but I wanted to provide something not completely sugary in case people weren’t in the mood for sweets. So I served this baked brie and a mound of blue cheese drizzled with honey (sounds weird but is so good) alongside some sliced fruit and crackers. My only complaint about baked brie is that, unless you keep it warm somehow, it congeals fairly quickly, so I might not serve it next time I have a party like this. But I did love the combination of brie and red pepper jelly, especially when eaten with pear slices.

Monday, November 22, 2010

Fast White Bean Stew

In an effort to eat better quality food, I recently started buying my meat from a local farm. This is advantageous in a lot of ways, but one of the few disadvantages is that you can’t pick and choose your cuts. With our recent pork order, for example, I received a few packages of thick, uncooked ham slices. I’m not a big fan of ham, so they sat in our freezer for the past couple of months until Mike, thinking that they were ordinary deli-style ham slices, put them in the fridge to thaw.

Imagine his disappointment when he realized that the contents of the package marked “ham slices” would not be going on a sandwich with mustard and cheese anytime soon. Instead we cooked the ham, cubed it, and, while Mike ate some of it in omelettes and the like, I went looking for a soup recipe to use it in. In my search I came across mostly split pea soup (which I love but Mike hates, so no go), or rich, creamy stuff like corn chowders that weren't what I was feeling at the moment.

I probably would never have made the recipe posted below if not for all the glowing reviews it received on epicurious.com. At first glance it seemed too minimalist to create a great soup and the ingredients struck me as kind of an odd mix. However, I had all the ingredients on hand so I decided to trust in the reviewers and make a batch. And man am I glad I did. This soup was incredibly quick and easy to make, yet it had the complexity and flavor of something that had been simmering away for hours. It was hearty and satisfying but still healthy: a perfect weeknight dinner for the busy, food-filled holiday season. If only I had some more ham…

White Bean Stew (From Gourmet Magazine, January 2007, via epicurious.com)

I did tweak this recipe just a little bit. Like many reviewers, I used baby spinach instead of the romaine or arugula that the recipe recommended. I also added a little bit of paprika and cayenne pepper to the soup to give it a little heat. Red pepper flakes would probably also work well. Oh, and I skipped the toasts. I thought this soup was filling enough not to need bread served with it.


2 large garlic cloves, chopped
1/4 cup plus 1/2 tablespoon extra-virgin olive oil
1 (14- to 15-ounce) can stewed tomatoes (I used Italian style)
1 3/4 cups reduced-sodium chicken broth
2 (19-ounce) cans cannellini beans, rinsed and drained (3 cups)
1 (1/2-pound) piece baked ham (1/2 to 3/4 inch thick), cut into 1/2-inch cubes
1/4 teaspoon black pepper
1 (5-ounce) bag baby romaine, baby arugula, or baby spinach (10 cups loosely packed)
8 (3/4-inch-thick) slices baguette
pinch of paprika and cayenne pepper, if desired

1) Cook garlic in 1/4 cup oil in a 3 1/2- to 4 1/2-quart heavy pot over moderately high heat, stirring, until golden, 1 to 2 minutes.
2) Coarsely cut up tomatoes in can with kitchen shears, then add (with juice) to garlic in oil.(I skipped this step and just broke up the tomatoes with a spatula when I added them to the pot).
3) Stir in broth, beans, ham, and pepper and bring to a boil.
4) Reduce heat and simmer, uncovered, 5 minutes. Stir in greens and cook until wilted, 3 minutes for romaine or 1 minute for arugula.
5) While stew is simmering, preheat broiler. Put bread on a baking sheet and drizzle with remaining 1/2 tablespoon oil.
6) Broil 3 to 4 inches from heat until golden, 1 to 1 1/2 minutes.

Friday, November 19, 2010

Toffee Apple Dip

I have kind of a complex about people coming over to my house. When we have guests over I don’t really care if the house is spotless or if my spaz of a dog is under control, but what I do freak out over is ---no surprise here--food. I need to feed people, plain and simple. So when Mike called me last week to tell me that friends were coming over for a Jazz game at 5:00 that night, my mind immediately went into panic mode thinking that I had no time to make anything for dinner.

Mike quickly reassured me that, since it was an early game, we could all go to dinner afterward and not worry about eating at our house. That seemed reasonable to me, so I went about my day fully planning on providing our guests only with a space to socialize and enjoy each other’s company without plying them with food the way I usually do.

However, the moment I walked in the door from work this sensible plan flew right out of my head, and was replaced by my characteristically dramatic stream of crazy thoughts: “What if people are hungry? What if they come straight over from work and need a snack? What if they don’t feel comfortable enough to ask for something to eat so they spend the game starving and never want to come back to our house again? What if we become known as the people that never feed anyone and everyone hates us?!” So I made this apple dip.

This dip is a funny thing to watch people eat for the first time. They usually take a bite and immediately say “what is this?” then marvel at the fact that something that is essentially just cream cheese and sugar could taste this good. Definitely a crowd-pleaser. And yet I still worried that there might be someone without a sweet tooth present so I went ahead and made nachos at half-time. Did I mention I have issues?

Toffee Apple Dip (from the Ivory Favorites cookbook)

1 (8 oz.) package cream cheese
1/2 cup brown sugar
1/4 cup sugar
1 teaspoon vanilla
About half of an 11 oz. bag of Heath or Skor bits (just add to your liking)

1) Beat cream cheese and sugar until fluffy.
2) Stir in vanilla and toffee bits.

Thursday, November 11, 2010

Butternut Chicken Curry

It surprises me how often I hear people make a blanket statement about not liking curry, since the term doesn’t really apply to one specific food or spice but a wide variety of South Asian dishes. To me a tangy, runny Thai curry tastes completely different from a thick, cumin-y Indian one. But that could be because I have yet to meet a curry that I didn’t like. In fact, once the weather starts getting cold and snowy like it did this week I immediately start craving Chanon Thai’s red curry with tofu. One bite of that stuff will chase the chill right out of you.

The curry recipe posted below is very much an Americanized, mild dish—perfect for those who are skeptical about eating this kind of stuff. I found it while looking through my cookbooks for a recipe to use up some butternut squash, specifically a savory one since it seems like most methods for cooking squash favor a sweet preparation involving cinnamon, nutmeg, etc. I loved the way this turned out—the bland, sweet flavor of the squash was a perfect complement to a slightly spicy, flavorful sauce. It was also simple to make and made for excellent leftovers throughout the week. Highly recommended.

Butternut Chicken Curry (from the Keeping Up Cookbook)

I did have to make a few tweaks to the original version of this recipe. I could tell at the outset that the one tablespoon of fish sauce it called for was going to be way too much so I reduced that amount, as well as the amount of onion. I added some carrots and red pepper, but you could really use any other veggies you want (potatoes, snap peas, mushrooms, etc.). I also had issues with my sauce being way too thick. I’m thinking this is because my chicken took twice as long to cook as the recipe indicated, so the squash broke down a bit and thickened the sauce. I solved this problem by adding some hot water every time it got too gloopy, but in the future I think I’ll just start cooking the chicken earlier in the recipe.

Note: most grocers carry curry paste, coconut milk, and fish sauce but you can find this stuff for a lot cheaper at your local Asian market.

1 small butternut squash, seeded, peeled and diced
1 (14 ounce) can of unsweetened coconut milk, lite or regular
1 heaping tablespoon mild Indian curry paste, such as Patak’s*
1/2 medium onion, diced
3-4 chicken breasts, cut into bite size pieces (I only used 2)
1 tablespoon brown sugar
1/2 tablespoon Thai fish sauce
1 carrot, peeled and cut into chunks (or a bunch of baby carrots cut in half, which is what I used)
1 red bell pepper, cored, seeded, and sliced
1 tsp. salt

1) Place squash and carrots in a microwave-safe dish and add enough water to just cover bottom of dish. Cover and microwave for several minutes until squash is tender. (mine took a lot longer than the "several" implies. About ten minutes total).
2) Drain water and set aside.
3) Bring 1/4 cup coconut milk and curry paste to a simmer in a large skillet over medium heat, whisking constantly.
4) Add onion and bell pepper and saute for 5 minutes (I would probably add the chicken at this point, too, but I can’t say that definitely because I haven’t tried doing it yet).
5) Stir in remaining coconut milk, sugar, salt, and fish sauce, then add chicken, squash, and carrots.
6) Simmer until chicken is cooked through, stirring often, 6-8 minutes. Serve over rice, couscous, or pilaf.

*I bought the “hot” version of the recommended brand and it wasn’t too spicy at all. If you like a little heat to your curry, I would suggest buying something stronger than the mild variety and adding more of it.

Friday, October 29, 2010

A pizza fit for Fall

I like to think of pizza as a blank canvas. The possibilities are endless when it comes to sauce, cheese, toppings, etc. A while back I heard about a pizza made with butternut squash and blue cheese. I have no idea how I first found out about it (a google search revealed that the combo is pretty ubiquitous), but a rainy Sunday afternoon last week found me in the kitchen with some leftover pizza dough and blue cheese at my disposal, along with a squash sitting on the counter, so I immediately recalled that combination and got to work.

The end result of my experiment would have been perfect had my blue cheese not been oh-so-very-strong from sitting in my fridge for about a month. But even with the overpowering blue cheese flavor, this combo was still delicious. The saltiness of the cheese mingled perfectly with the sweet roasted squash, caramelized onions, and red bell peppers. Plus the combination of colorful ingredients made this pizza a feast for the eyes as well as the taste buds. Eating it kind of eased my sorrow over the fact that grilled pizza season is over.

Autumn Pizza

I didn't list amounts for the ingredients in this recipe, since that is going to depend on how big your pizza is and how much of each topping you prefer.

One pizza crust (my basic dough recipe is posted here)
Butternut squash, peeled, seeded, and cubed
Olive oil
Kosher salt
One sweet yellow onion
Red bell pepper, thinly sliced
Mozzarella cheese
Blue cheese (or another dry, crumbly, salty cheese such as feta)


1) Toss squash with enough oil to thinly coat. Spread in a single layer on a baking sheet and sprinkle with salt. Roast at 400 for about 40 minutes, or until squash is fork-tender.
2) Saute onions in olive oil over medium heat. Add 1 tsp. salt and saute until onions are golden brown and reduced, about 20-30 min. (This process is called caramelizing and you can find more detailed instructions here).
3) Roll pizza dough out to desired thickness (I like mine pretty thin). Place on a baking sheet that is either sprayed with cooking spray or dusted with cornmeal and brush with olive oil.
4) Top with desired amount of squash, onions, bell peppers, and cheese (I would suggest maintaining about a 4:1 ratio of mozzarella to blue cheese. But that amount depends entirely on how strong your cheese is).
5) Bake at 450 for about 15 minutes (or according to crust recipe directions).

Monday, October 25, 2010

Pumpkin Cinnamon Rolls

The fall baking craze continues! I gave you all a bit of a break with the healthy beans and rice recipe I posted last week, but now I'm back with a delicious and sinful recipe for pumpkin cinnamon rolls. Tell your waistline I'm very sorry.

When I first saw the amount of spices in this recipe I was a bit nervous that I'd end up with something that tasted too strong, but these rolls actually ended up being quite lovely. They have just enough spice and pumpkin flavor to set them apart from regular cinnamon rolls without hitting you over the head with nutmeg or ginger. The cream cheese frosting really completes them, as it does most pumpkin goods. Make and enjoy, my friends.

Pumpkin Cinnamon Rolls (adapted ever-so-slightly from goodlifeeats.com)


Dough:
1/4 cup warm water (not hot, about 110 degrees)
1 package (2 1/4 teaspoons) active dry yeast
1/3 cup warm milk
1 large egg, beaten
3/4 cup pumpkin puree, either fresh or canned
1 tablespoon melted butter
2 cups (approximately) All-Purpose Flour
1 1 /4 cup Whole Wheat Flour
1/2 cup brown sugar
1 teaspoon salt
1/2 teaspoon cinnamon
1/4 teaspoon ground ginger
1/4 teaspoon ground cardamom


Filling:
1 stick butter
2/3 cup white sugar
1/4 cup brown sugar
2 teaspoons cinnamon
1/2 teaspoon ginger
1/4 teaspoon nutmeg
1/8 teaspoon cloves

Directions:
1) In a large bowl, stir yeast into water to soften. Let rest for 5 minutes before stirring.
2) Add milk, eggs, pumpkin, butter, 1 1/4 cups whole wheat flour, brown sugar, salt, cinnamon, ginger and cardamom to yeast mixture. Beat vigorously for 2 minutes.
3) Gradually add remaining flour (all purpose), a little at a time, until you have a dough stiff enough to knead. Start with about 1 1/2 cups and increase if necessary.
4) Turn dough out onto a floured surface. Knead, adding flour as necessary, until you have a smooth, elastic dough.*
5) Put dough into an oiled bowl. Turn once to coat entire ball of dough with oil. Cover with a towel and let rise until doubled, about 1 hour.
6) Combine the white sugar, brown sugar, cinnamon, ginger, nutmeg and cloves in a small bowl, set aside.
7) Transfer the risen dough to a lightly greased work surface, and pat or roll it into a 16" x 12" rectangle.
8) Spread softened butter over dough and then sprinkle with the sugar mixture.
9) Roll the dough into a log the long way; it'll stretch to about 20" long as you roll. Using a very sharp knife, slice the log into 15 slices. In order to cut down on drag, it helps to rinse the blade in hot water, and wipe it off, between slices.
10) Place slices in a greased 9x13 inch baking pan (or in two 8 or 9 inch round cake or pie pans). 11) Cover with a towel and let rise until almost doubled, about 45 minutes.
12) Bake at 375 for 20-30 minutes, until rolls are brown around the edges and beginning to turn golden brown across the center.

*I had to knead in quite a bit of flour to keep the dough from being a sticky mess, so if you're nervous about using a lot, don't be.


Cream Cheese Frosting
4 ounces cream cheese
1 stick (4 ounces) butter, softened
1 teaspoon vanilla extract
2-3 cups powdered sugar

1) Combine cream cheese, butter, and vanilla in the bowl of an electric mixer. Beat until smooth and combined.
2) Add sugar to cream cheese mixture 1/2 cup at a time and mix until desired consistency is reached (I used about 2 1/2 cups).
3) Spread liberally on warm cinnamon rolls.

Friday, October 22, 2010

Black Beans and Rice

I tend to be kind of obsessive when it comes to the things I like. Meaning that I’m the kind of person who, after Regina Spektor’s new album came out a couple of summers ago, listened to this song so many times on a road trip that Mike threatened to drop me off on the side of the freeway and leave me to the wolves if I pressed “repeat” one more time. It also means that I can eat the same thing for lunch day after day without getting sick of it.

I’ve never been much for the traditional packed lunch: a sandwich or frozen entree surrounded by odds and ends like yogurt, chips, fruit, etc. I like it best when my lunches consist of leftovers from last night’s dinner or some other form of “real food.” Not that this happens very often. Usually my mid-day meal is comprised of random stuff that I grab out of the fridge while running out the door to work. Lately I’ve been on quite the edamame kick (you can buy frozen individual bags at Costco), and for a while there when tomatoes were in season I would cut one into wedges, sprinkle with some sea salt, and call it lunch. Delicious, but not exactly filling.

Sometimes, though, I actually take initiative and plan my lunches in advance. For example, when I made this tzatziki, I kept it--along with some pita bread, grilled chicken, cucumbers, and tomatoes--in my fridge at work and ate it for lunch every day for a week. The beans and rice dish posted below was actually made with the intention of having it for dinner, but somehow we didn’t end up eating it that night* so it also turned into my week-long lunch. And boy has it been a good one. You wouldn’t think that something as simple as rice and beans would create a satisfying meal, but these beans are packed with flavor and, when you pair them with some cooked brown rice, you’re eating a complete protein that is cheap, filling, nutritious, and made with mostly pantry ingredients. Plus it ages well, actually getting more flavorful as I reheated it day after day. I will definitely be making this again. Or--more likely given my personality--again and again and again.

*By “somehow didn’t end up eating it”, I mean that our dinner that night consisted of pumpkin cinnamon rolls (recipe to be posted shortly). Don’t judge me.

Black Beans and Rice (adapted slightly from melskitchencafe.com)


1 tablespoon olive oil
1 green bell pepper, seeded and chopped
1/2 white or yellow onion, finely chopped
3 cloves garlic, finely minced
2 (16-ounce) can black beans, rinsed and drained
1 (14.5-ounce) can diced tomatoes, undrained
1 1/2 cup low-sodium chicken broth
3/4 teaspoon dried thyme
1 bay leaf
1/2 teaspoon dried oregano
½ teaspoon cumin
1/2 cup water
2 tablespoons finely chopped fresh cilantro
Salt and freshly ground pepper to taste
4-5 cups hot, cooked brown rice

1) In a medium saucepan, heat the oil over medium heat.
2) Add the bell pepper, onion and garlic and saute, stirring often, for about 15 minutes, until all the vegetables are soft and tender.
3) Stir in the beans, tomatoes, chicken broth, thyme, bay leaf, oregano and water; bring to a boil. 4) Reduce the heat and simmer, stirring occasionally, until the sauce thickens and the vegetables are tender, about 45 minutes. If the mixture becomes too thick, add a tablespoon or two of hot water to thin to desired consistency.
5) Stir in the fresh cilantro and season with salt and pepper; discard the bay leaf. Serve over the hot rice.

Thursday, October 21, 2010

Pumpkin Chocolate Chip Cookies

There are many things to love about autumn: the beautiful leaves, crisp air, football season, the return of sweaters and boots into your wardrobe, etc. Mike pointed out another one a few nights ago when, as I was taking yet another tray of cookies out of the oven, he breathed a sigh of contentment and said “I’m so glad it’s baking season again.” Apparently at my house fall has come to be known as “baking season.”

The amount of baking I do in the summer tends to be minimal. Probably because I’d rather spend any free time doing other non-indoor activities, and frozen yogurt or a snow cone always sounds like a better cure for a sweet tooth in the hot summer months than a rich cookie or brownie. However, the moment the thermostat drops and the sun starts to set long before bedtime, you will often find me in the kitchen looking for an excuse to transform butter, sugar, and flour into something tasty. Luckily fall happens to be my favorite time of year to go running, otherwise it might also become known as the Season in Which I Buy Bigger Pants.

Usually my token fall pumpkin recipe is this bread, but last weekend I decided to try these cookies after my sister recommended the recipe. Prior to making these I had never tasted a pumpkin chocolate chip cookie that I truly loved. Most were too bland, some were too dry, others were ridiculously over-spiced. This recipe struck the perfect balance, and my goldilocks-like search for the perfect pumpkin chocolate chip cookie came to an end. I’ll probably make them a few more times before Thanksgiving comes around. After all, it is baking season.

Pumpkin Chocolate Chip Cookies


1 ½ cups canned pumpkin
1 egg
1 tsp. vanilla
½ cup vegetable oil
1 tsp. nutmeg
1 tsp. cinnamon
1 tsp. baking soda
1 tsp. baking powder
1 ½ cups sugar
½ tsp. salt
2 ½ cups flour
¾ cup chocolate chips (you can use milk or semi-sweet, I used a mixture of both. And I probably used about a cup, maybe a little more)

1) In a large mixing bowl, combine all ingredients except flour and chocolate chips. Mix well.
2) Add flour and mix to combine.
3) Stir in chocolate chips.
4) Drop by spoonful onto greased cookie sheets.
5) Bake at 350 for about 15-17 minutes.*

*When it comes to cookies, I am usually paranoid about overbaking. Nothing worse than a dry, crunchy cookie, right? Well in this case I would actually be more worried about underbaking, as these cookies will be pretty gooey if you don’t bake them long enough and, because they are so moist, it’s hard to overbake them. I left mine in for about 17 minutes as opposed to the 15 the recipe called for and that worked perfectly.

Friday, October 15, 2010

Apple Pie

If you visit my parents’ house anytime during the months of August through October, you will most likely find their back patio lined with boxes of peaches, plums, tomatoes, nectarines, and other farm-grown delights typical of this time of year. My parents have always been big on eating lots of fruit and vegetables, so to supplement what their garden produces my dad makes a weekly trek to the Murray farmer’s market.

Those of you that know my dad as a calm, softspoken person really need to see him in action at the farmer’s market. He bounces from stand to stand examining peaches, haggling over the price of bell peppers, chatting with the farmers he has come to know on a first-name basis, and looking more like a buyer for a high-end department store than a guy buying tomatoes for his family. To my dad, the farmer’s market is serious business. I should know: one time he and my mom were going to be out of town for the weekend so he asked me to fill in for him as the produce purchaser for the family. I was given a wad of twenty dollar bills and a hand-drawn map of the market detailing which farmer sold the best corn, where I could get the best price on plums, the name of the stand that sells my dad’s favorite cranberry walnut bread, etc. I was overwhelmed to say the least.

The upside of my dad’s obsession is that every time I go to my parents’ house I leave with my arms full of delicious fresh produce. My parents practically force the stuff on me and I am more than happy to accept. Right around the end of September my haul starts including apples. Lots and lots of apples. I devour my favorite varieties—honeycrisp and jonagold—almost instantly, but a few no-name apples inevitably wind up forgotten at the bottom of the produce drawer. A little too soft or unsightly to be eaten straight-up, these apples are the ones that find new life as apple pies.

I don’t care how stellar an apple pie recipe claims to be, the secret of a great apple pie is the apples. If the apples taste good, so will the pie. And don’t judge by appearance here- I’ve found that the ugly misshapen apples my dad brings home from the market taste a million times better than the perfectly-shaped, waxed ones you find at the grocery store. I usually like to use a mix of sweet and tart apples in my pies, and will taste the apples as I peel and slice to make sure I like them. The recipe below is very much a bare bones take on apple pie, so if the only apples you have at your disposal are lacking in flavor, I would recommend using a more complex recipe. Otherwise, go right ahead and bake this pie. And please serve it warm with vanilla ice cream. Otherwise I might be inclined to think that your mama didn’t raise you right.

Apple Pie

I wish I had a crust recipe to share with you on this one, but I am a bit of a pie crust slut and have never used the same recipe twice. I’ve tried everything from the recipe on the back of the Crisco can to Smitten Kitchen’s all-butter crust and have yet to declare a favorite. They’ve all been good, though, and when I am ready to give up my pie crust promiscuity and commit to one favorite recipe, you all will be the first to know.

1 nine-inch double-crust pie pastry
5-7 apples, peeled, cored, and thinly sliced
¾-1 cup sugar (depending on how sweet or tart your apples are)
¼ tsp. nutmeg
1-2 tsp. cinnamon (just add to your liking- I usually use the lesser quantity)
2 Tbsp. flour
2 Tbsp. butter
1 egg, beaten with 1 Tbsp water (for egg wash)

1) Place apples in a bowl with sugar, cinnamon, nutmeg, and flour. Stir to coat all the apples.
2) Place bottom pie crust in a 9-inch pie plate and mound apple mixture on top.
3) Cut butter into small pieces and dot the apple mixture with it.
4) Top with the second crust and crimp edges to seal.
5) Brush top crust with egg wash and cut a few slits in it (I do about 6 I think).
6) Bake pie at 450 for ten minutes, then turn the oven down to 350 and bake for an additional 40 minutes, or until apples are soft.

Tuesday, October 5, 2010

Cinnamon Rolls

It seems like Mormon culture dictates that a lavish breakfast be eaten during the Sunday morning session of General Conference. Some people make egg casseroles, others prepare German pancakes or french toast, but cinnamon rolls seem to be the most popular option when the time for “church in your pajamas” rolls around. Growing up I never had the standard Utah conference viewing experience because my parents interpreted the talks into Russian, so us kids were hauled downtown along with them when we were younger and left home to fend for ourselves as soon as we were old enough. This year's conference actually marked the first time that neither one of my parents had to interpret the Sunday morning session, so we celebrated this newfound normalcy by gathering the family together for some conference viewing and a breakfast of—you guessed it—cinnamon rolls.

Making homemade cinnamon rolls might sound like an unnecessary pain in the butt to some, my dear husband being among them (“why don’t you just buy the Pillsbury ones?”) but the finished product is well worth the extra effort. This is mostly because the homemade rolls taste a lot better, but also because you don’t have to worry about strange chemicals and preservatives creeping in. Plus I find the whole roll-making process, as long as you don’t feel the need to rush through it, to be very zen. There’s something soothing about rolling the dough out and feeling it under your hands as you shape it. Kind of like play-doh for adults. I’m already looking forward to making a batch on a snowy afternoon while listening to Christmas carols.

There seem to be many methods of making cinnamon rolls. Some produce a flaky, buttery roll topped with thick cream cheese frosting, while the opposite end of the spectrum yields hearty whole wheat specimens filled with raisins and nuts. The recipe listed below is my favorite take on the cinnamon roll: a soft, white yeast dough filled with plenty of cinnamon sugar and topped with a thin frosting that seeps into the warm rolls and acts like more of a glaze. Delicious.

Cinnamon Rolls (Adapted from The Pioneer Woman)
Do you read the pioneer woman’s blog? If not, you should. She is delightful. And her recipes, although not really my style of everyday food, are terrific. Besides her cinnamon rolls I’ve also made her pot roast, brisket, and chocolate sheet cake. All of which are fabulous.

I’ve scaled down the quantities of PW’s recipe and changed the ingredients around a bit for the filling and frosting, but you can find her original post here. It includes beautiful step-by-step photographs of the entire process (which you should know you won’t find around these parts) so use it as a guide when making these for the first time.

The Pioneer Woman also created a “Notes on Cinnamon Rolls” post to address some questions about this popular recipe. I would recommend checking that one out as well. And now, without further ado, a yellowish, low-quality photo of one these cinnamon rolls taken with my cell phone. Enjoy:
Oh, and the recipe (yields about 2 dozen rolls):

Dough:
2 cups Whole Milk
1/2 cup Vegetable Oil
1/2 cup Sugar
1 package Active Dry Yeast (2 ¼ tsp.)
4 1/2 cups All-purpose Flour, divided
1/2 teaspoon (heaping) Baking Powder
1/2 teaspoon (scant) Baking Soda
1/2 Tablespoon (heaping) Salt

Filling:
1 cup softened butter
1 cup brown sugar
Generous Sprinkling of Cinnamon

1) Mix the milk, vegetable oil and sugar in a pan. Scald the mixture (heat until just before the boiling point). Turn off heat and leave to cool 45 minutes to 1 hour.
2) When the mixture is lukewarm to warm, but NOT hot, sprinkle in yeast. Let this sit for a minute. Then add 4 cups of all-purpose flour. Stir mixture together. Cover and let rise for at least an hour.
3) After rising for at least an hour, add 1/2 cup of flour, the baking powder, baking soda and salt. Stir mixture together. (At this point, you could cover the dough and put it in the fridge until you need it – overnight or even a day or two, if necessary. Just keep your eye on it and if it starts to overflow out of the pan, just punch it down).
4) When ready to prepare rolls: Sprinkle rolling surface generously with flour. Take half the dough and form a rough rectangle. Then roll the dough thin (mine was probably about a ½ inch, maybe a little thinner), maintaining a general rectangular shape.
5) Spread about ½ cup (1 stick) softened butter over the dough. Then sprinkle 1/2 cup of sugar over the butter, followed by a generous sprinkling of cinnamon. (These quantities are all approximate- just add them to your liking).
6) Roll the dough in a neat line toward you. Keep the roll relatively tight as you go. Pinch the seam of the roll to seal it.
7) Cut the rolls approximately ¾ to 1 inch thick and lay them in buttered pans (I’ve found a dozen rolls fit perfectly in a rectangular 9x13 pan).
8) Repeat this process with the other half of the dough. Let the rolls rise for 20 to 30 minutes.
9) Bake at 375 degrees until light golden brown, about 15 to 18 minutes.

Frosting
1 lb. Powdered Sugar
1 teaspoon vanilla
2 Tablespoons melted butter
Enough milk to achieve desired consistency (about 1/3 cup)

Mix together all ingredients and whisk until smooth. It should be thick but pourable. Taste and adjust as needed. Generously drizzle over the warm rolls.

Monday, October 4, 2010

Fresh Tomato Sauce

There is something so satisfying about basic cooking. The kind of cooking that requires no fancy ingredients, complicated techniques, or any kind of stress. The kind of cooking that allows you to turn off your brain and let your hands do all the work. The kind of cooking that turns a bowl of excess tomatoes on the verge of spoiling into a vibrant sauce that beats anything you could ever buy in a grocery store.

I made this sauce last weekend while Butch was at priesthood session and I had the house to myself. Usually I spend this night hanging out with my mom and sisters or girlfriends, but this time around I was very much craving some alone time. I had every intention of relaxing (I even rented a movie from redbox), yet somehow I ended up in the kitchen making homemade cinnamon rolls (recipe will be posted shortly) and tomato sauce.

If I could recommend any sort of therapy for feeling overwhelmed and stressed out, it would be to spend some time in the kitchen peeling and chopping tomatoes while listening to the Pandora station of your choice (I picked The Arcade Fire), then curling up on the couch with a good book as the fruit of your labors simmers away on the stove. It’s a time-consuming process but a dead simple one that will make you feel surprisingly competent and useful. If you’re anything like me, you will feel a great sense of accomplishment in knowing that, although you may not have control over the abstract worries in your life, you can still work some magic with a tomato.

Fresh Tomato Sauce (From The Gourmet Cookbook)
This recipe is a very bare-bones sauce that lets the amazing flavor of fresh tomatoes dominate, but you can change it up by adding more vegetables (carrots, celery, onion) or seasonings (crushed red pepper, oregano) of your choice.

6 pounds fresh tomatoes, peeled*
¼ cup extra virgin olive oil
5 garlic gloves, thinly sliced
1 tsp. salt
1 tsp. sugar
¼ cup fresh basil leaves, chopped

1) Core tomatoes and halve crosswise.
2) Working over a sieve set over a bowl, squeeze tomatoes gently to remove seeds.
Discard seeds and reserve juice.
3) Coarsely chop tomatoes.
4) Heat oil in a large pot over moderately high heat until hot but not smoking. Add garlic and cook, stirring, until just golden (about 1 minute).
5) Add tomatoes, reserved juice, sugar, and salt.
6) Bring to a simmer and simmer, uncovered, stirring occasionally, until thickened and reduced to your liking (mine took about an hour).
7) Stir in basil and salt to taste.

*The easiest way to peel tomatoes is by blanching them. Make an “X” with a paring knife in the skin on the bottom of each tomato, then lower them with a slotted spoon into a pot of boiling water for about ten seconds. Plunge into a bowl of ice cold water to stop the cooking process, then peel off the skin at the “X” (it should slide right off).

Tuesday, September 28, 2010

Raspberry Cheesecake Trifle

A while back I was reading an article in a goofy women’s magazine entitled “How to Maintain Your Weight During the Holidays” or something to that effect. What was unusual about it, however, is that I still remember the author’s clever intro to the article. Of course I can’t quote it directly, but she said something like “I always hear people saying to eat before you go to a party, but then I think ‘what’s the point of going if you don’t eat?’ Oh, people. Right.”

I love to socialize as much as the next person, but I’d have to say that I’m with the aforementioned author when it comes to my party priorities. Case in point: I threw a bridal shower for my best friend last month. The shower involved no cutesy decorations or elaborate games. It consisted only of friends gathering in my living room to chat and munch on Mediterranean pasta, green salad, pita triangles and hummus, cantaloupe with fresh mint, a platter of chocolate chip cookies, and raspberry cheesecake trifle.

When it comes to desserts, trifle is a definite showstopper. True, it starts looking downright sad and messy once people dig in, but before that first spoon is sunk into the trifle those pristine layers of custard and fruit are definitely worth all the oohs and aahs that escape people’s mouths when they see them shining through a glass bowl. This trifle in particular is quite the beauty— juicy red raspberries juxtaposed with pale layers of creamy, cake-y goodness. And its pretty appearance is matched only by this trifle’s delicious flavor. Plus it is a cinch to make and is assembled in advance, which makes it perfect for entertaining. So next time you find yourself hosting a gathering, don’t stress over decorations or party favors. Make this trifle instead.

Sylvia’s Raspberry Cheesecake Trifle

This recipe was given to me by a friend of the family, who made this trifle for my sister’s bridal shower. It easily feeds up to twelve people, and is perfect for those springtime occasions when you want a fruity dessert but nothing is really in season yet. My family has kind of made it our traditional Easter dessert. In fact, I think the photos below were randomly taken while transporting the trifle from my house to my parents.’ Classy. But at least you get an idea of what it’s supposed to look like, right?


2 (8 oz) packages cream cheese, softened*
2 cups powdered sugar
1 tsp. vanilla
½ tsp. almond extract
1 cup sour cream
1 cup whipping cream (measure one cup liquid cream- then whip it)
2 bags frozen raspberries
1 prepared angel food cake

1) Combine first six ingredients (I use the whisk attachment on my KitchenAid to get rip of any lumps)
2) Cut angel food cake into bite-size cubes and fold into cream cheese mixture
3) Layer cake mixture and raspberries in a large bowl, beginning with the cake and ending with the raspberries.
4) Cover and refrigerate overnight, or until raspberries are thoroughly thawed.
*I have messed this recipe up by not letting the cream cheese thoroughly soften. I ended up with little lumps of cream cheese in the cake mixture and it was not a pretty sight. So make sure your cream cheese is soft and smooth- I find Philadelphia brand works best.

Tuesday, September 21, 2010

Russian Salad

All right, I know I’ve already done my fair share of whining about the end of summer on this blog, but will you indulge me for just a little while longer? See, last night Mike and I ate the kind of meal that I know I will daydream about during the dark, cold winter months. Right now with the onset of fall I’m finding the prospect of rich soups and stews exciting, but I know once January hits and I’m staring down yet another root vegetable my mind will inevitably wander back to the simple freshness of summer meals. In this case, grilled teriyaki salmon and zucchini, quinoa with mushrooms and sun-dried tomatoes, corn on the cob (my very favorite food), and the tomato-and-cucumber concoction my family refers to as “Russian Salad.”

I really don’t know why, since my family is Russian and many of the salads served at my parent’s house are decidedly influenced by that heritage, this particular salad was bestowed that title. But that mystery is not what matters here. What matters is that, after you see the brief list of ingredients for this salad, you must not turn up your nose and dismiss it as something that could only be enjoyed by Eastern Europeans. Please trust me when I tell you that sour cream, when combined with juicy, garden-fresh tomatoes and cucumbers, loses its thick creamy density and transforms instead into a pleasantly light, tangy, pink (!) dressing that some of us (not going to mention any names here) have been known to slurp from the bottom of the bowl after the substantial part of the salad has been eaten.

Earlier this summer I made a variation of this salad from one of Ina Garten’s cookbooks. It was way more complicated and not nearly as good. I think simplicity definitely wins out in this case. However, because this recipe is so simple, you want to use only the best and freshest ingredients. Meaning underripe hothouse tomatoes and flavorless cucumbers aren’t gonna cut it. Use only the tomatoes and cucumbers that you would want to eat all by themselves; the kind that (sigh) are only available in the summer.

Russian Salad


1 ripe tomato (I used a bunch of halved cherry tomatoes in the photo above)
1 ripe cucumber
½ small red onion, thinly sliced (I usually leave this out)
Sour cream
Salt, to taste
Minced fresh dill, if desired (I rarely have the dill on hand-this salad is fine without it but even better with the dill)

1) Peel cucumber and cut in half lengthwise, then thinly slice.
2) Cut tomato into pieces approximately the size of the cucumber
3) Combine tomato, cucumber and onion (if using) in a bowl and add a heaping tablespoon (the eating kind, not a measuring spoon) of sour cream.
4) Stir together and add salt and dill to taste. You can also add more sour cream if you think it’s necessary. It’s hard to add too much because the excess will just get watery and sit in the bottom of the bowl- it won’t coat the other ingredients.
5) Let the salad sit for about 5 or 10 minutes before serving.

Tuesday, September 14, 2010

Leslie's chocolate chip cookies

I am convinced that the world would be a better place if everyone had neighbors like the Knaphus family. Theirs is the kind of home where the whole neighborhood is routinely invited over for scone parties on Sunday afternoons, donuts are fried up in the driveway every Halloween, and on any given day the living room couches are filled with various neighbors and friends dropping by to visit. Last summer the K-naps got a snow cone machine, and ever since you will find their front lawn teeming with kids and families on hot summer nights. A small block party that the Knaphuses threw a few years ago in their driveway has evolved into Hollystock, an annual event that requires the closure of a whole street due to the high turnout. It truly is the stuff of simpler times.

I was lucky enough to grow up across the street from the Knaphuses. My siblings and I are good friends with their boys and our family still congregates at their home frequently. No matter how large or small the occasion, be it Christmas Eve or a Utah football game, one element of these gatherings is constant: the food is amazing. Besides being some of the nicest people you will ever meet, Chris and Leslie are both fantastic cooks. I drool at the memory of Chris’ marinated tri-tip steak and look forward to the Superbowl every year not because of the game but because it means I will get to have some of Leslie’s delicious Superbowl bread (it’s essentially a giant cinnamon roll in the shape of a football but somehow tastes so much better than a normal cinnamon roll).

One trademark of Knaphus cooking is Leslie’s chocolate chip cookies. They are found at virtually every Knaphus function and are known by most people as “Leslie cookies.” I have yet to meet a person that does not love them. When I got married Leslie threw me a bridal shower and gave me her tricks of the trade: baking sheets, parchment paper liners, a cookie scoop, and the recipe for these cookies. I had to laugh when I noticed that her recipe yielded about eight dozen of these suckers. I guess you don’t become my favorite family in the neighborhood by running out of cookies.

I’ve been trying to figure out what makes Leslie’s cookies so good and it comes down to this: In my opinion, chocolate chip cookies fall into two camps. There are the rich, buttery ones loaded with semisweet chocolate that are amazing when warm but taste a little too heavy once they’ve cooled down, and then there are what I call “cookie jar” cookies- the ones that taste a little less intense at first and therefore age much better. Leslie cookies are pretty much the ideal form of this type of cookie. I’m thinking what makes that the case is the use of milk chocolate chips and the addition of instant oats to the equation. For those of you thinking “she didn’t mention that this was an oatmeal chocolate chip cookie recipe”, let me state that I ate these for years without ever suspecting they contained anything of the sort. I’m guessing most connoisseurs of Leslie cookies would say the same. Because the oats in this recipe are instant and not the heartier rolled oats, they impart a subtle grainy flavor to balance out all the butter and sugar without changing the texture of the cookie. But don’t just take my word for it, go ahead and make a batch. And, if you feel like taking a page out of Leslie’s book, go share them with your neighbors.

Leslie’s Chocolate Chip Cookies

Don’t worry, I halved the original recipe so you won’t end up with a ton of cookies. This yields about 3-4 dozen. Also, the recipe Leslie gave me called for rolled oats but she told me that she always uses instant so I’ve made that change in my copy.

2 sticks softened butter (1 cup)
1 cup brown sugar
¾ cup granulated sugar
2 eggs
1 tsp. vanilla
Scant 3 cups flour
1 tsp. baking soda
½ tsp. salt
1 cup instant oats
1 (12 oz.) bag milk chocolate chips ( I like Guittard brand)

1) Cream butter and sugar
2) Add eggs and vanilla and mix until incorporated
3) Add flour, soda, salt, and oats
4) Stir in chocolate chips
5) Drop by rounded tablespoons (or use a cookie scoop- mine is about 1 ½ tablespoons) onto an ungreased cookie sheet.
6) Bake at 350 for about ten minutes, or until bottoms of cookies are lightly browned.

Wednesday, September 8, 2010

Tzatziki

Any picky eater can tell you that food is about more than just flavor. Some can’t handle tomatoes because of their wet texture, others hate the stringiness produced by melted cheese, etc. I am far from a picky eater (I can count the number of things I absolutely will not eat on one hand), but I too realize that the experience of eating can be as much about how a food feels as how it tastes. For example, one of my favorite culinary sensations is that interplay of hot and cold that occurs when you take a hot food and pair it with a cool, creamy condiment. Think nachos topped with sour cream, buffalo wings dipped in blue cheese dressing, or apple pie served with a scoop of vanilla ice cream.

Apparently the Greeks also recognized the genius of this pairing, as evidenced by tzatziki. This Greek cucumber yogurt dip can be eaten in a variety of ways, but my favorite is as a sauce for gyros or as an accompaniment to souvlaki. The cool notes of cucumber, dill, and mint, along with the tang of yogurt and vinegar, marry perfectly with the smoky taste of grilled meat and warm pita bread. Eat it on a sun-drenched patio to kick the Mediterranean experience up a notch.

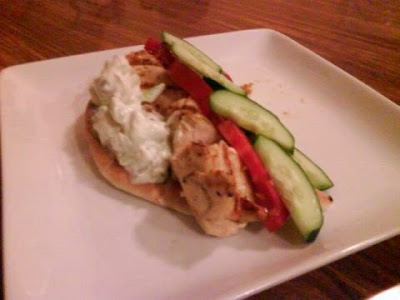
I’m sure there are plenty of recipes out there for preparing your own authentic gyro meat, but so far I haven’t felt the need to go there. Instead I made a “light gyro” of sorts by marinating chicken tenders in a mixture of olive oil, lemon juice, oregano, lemon pepper, and garlic, then grilling them over medium-high heat until done. I threw that onto a grilled pita with some tomatoes and cucumbers and topped it with the tzatziki. Delish.

Tzatziki
(adapted slightly from The Gourmet Cookbook)


3 cups plain yogurt (or Greek yogurt if you can swing it. I like fage brand best.)
1 seedless cucumber (those plastic-wrapped ones also called English or Hothouse cucumbers), peeled, seeded, and finely chopped
2 small garlic cloves, minced
1 Tablespoon extra virgin olive oil
¾ Tablespoon finely chopped fresh dill
½ Tablespoon finely chopped fresh mint
½ Tablespoon white wine vinegar
½ teaspoon salt

1) Put yogurt in a large sieve or colander lined with a double thickness of cheesecloth and set over a large bowl. Let drain for 24 hours (skip this step if using Greek yogurt).
2) Transfer yogurt to a clean bowl; discard the liquid collected in the bowl used to strain yogurt.
3) Stir in remaining ingredients and refrigerate, covered, for at least 4 hours.

Thursday, August 26, 2010

Grilled Pizza

The end of summer always leaves me with mixed emotions. I’m excited for fall, which is my very favorite season, and yet I never feel like I’ve gotten my fill of those only-in-the-summer things. I want more boating, more camping, more s’mores, more time by the pool, more popsicles, more long days, etc. And last night I discovered yet another item to add to this list: grilled pizza.

If there was ever a reason to curse my nasty procrastination habit it is the fact that I did not try this method of cooking pizza back in June when I first heard of it. The idea was always in the back of my mind, but somehow it wasn’t until this week that I actually got my butt in gear and threw some pizza dough on the grill. All I can say is that if I hadn’t been such a slacker, this pizza would have been a weekly summer staple. It is that good.

For those of you thinking “it’s just pizza made on a barbecue instead of an oven–how is that anything special?” trust me when I say that the flavor produced by this method is out of this world. Mike even claimed that it tasted exactly like the pizza at our favorite Italian-style pizzeria. I wouldn’t go that far, but I’m thinking that if you love the taste of pizza made in a wood-burning oven, this is the closest you’re going to come to recreating that sensation at home (unless you do in fact have a wood-burning pizza oven in your home).

So friends, this is your chance to learn from my mistakes. Don’t let these last barbecue-friendly weeks of summer go by without trying this at least once.

Grilled Pizza

The recipe for this pizza dough was given to me by my good friend Megan. I love it because it is very basic, requires no rising time, and is virtually impossible to screw up. Feel free to use any pizza dough that you love, though. Just make sure that it is homemade or good quality storebought, as a co-worker once told me that she tried to grill Pillsbury dough from a can and the results were disastrous.

1 packet active dry yeast (2 ¼ teaspoons)
1 cup warm water*
1 tsp. sugar
1 tsp. salt
1 Tbsp. olive oil
2 ½ cups all-purpose flour

1) Dissolve yeast in warm water. Add sugar.
2) Add water mixture to flour, salt, and olive oil.
3) Stir together until a dough forms.
4) Knead the dough for a couple of minutes (or use the dough hook attachment if you have a KitchenAid).
5) Let the dough rest for five minutes. It should be fairly smooth and elastic.
*You want the water to be just barely warmer than lukewarm. Hot water will kill the yeast and turn your dough into a sticky mess.

Grilling Instructions:
OK, so these instructions aren’t going to be super specific and detailed because I mostly just fiddled around with the grill and didn’t pay too much attention to cooking times and all that. I’m thinking that instructions will probably vary based on the type of grill you have and how thick your dough is anyway so I’m just going to give a general idea of how I went about it.

1) Preheat a grill to medium-high heat.
2) Roll out pizza dough to desired thickness (I like mine really thin).
3) Lightly oil grill (I use a paper towel dipped in olive oil) and place pizza dough on it.
4) When that side is cooked (should only take two minutes or so) remove it from the grill using tongs or a spatula and place pizza on a plate uncooked side-down.
5) Turn the grill down to medium.
6) Top the pizza with toppings of your choice. For the pizza above, I brushed the crust with a little olive oil, then topped it with thin tomato slices, torn basil leaves, and fresh mozzarella.
7) Slide pizza back onto the grill and close cover.
8) Cook until cheese is melted and the bottom crust is nicely browned. (Mine took about five or ten minutes). Adjust the heat on your grill if you need to, since you don't want the dough cooking before the cheese melts. But if that does happen, just take the pizza off the grill and throw it under the broiler for a minute or two.

Friday, August 20, 2010

Buttermilk Pound Cake

Whenever I ask someone what they would like me to bring to a function, my hope is that their answer will be “dessert” or “a treat.” This is partly because I love to bake but also really love to eat, so making a pan of brownies or a batch of cookies for just Mike and I is bad news. I’m also what my friend Marianne calls a “feeder”, meaning that I love nothing more than to cook for people, and while a good salad might be appreciated, that combination of sweetness and fat we call dessert seems to be where people really feel the love.

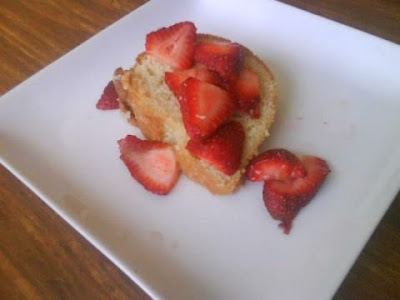
This cake was first made in response to my Mother-In-Law’s request that I bring dessert to a Father’s Day barbecue. Strawberries were in the peak of their season so I wanted to incorporate them in a dessert but didn’t feel like going the angel food route (too sweet) or making a traditional shortcake (not sweet enough). This pound cake turned out to be a perfect compromise. It is sweet but not overly so, and has some substance and density to it without tasting excessively rich or buttery like most pound cakes. In fact, I think the term pound cake is a little misleading here, as the cake this recipe produces is more of a really moist loaf cake.

But what’s in a name? The bottom line here is that, if you are a feeder like myself, you should make this cake the next time your cooking skills are called upon. Serve it with some fresh berries and whipped cream, or even just a scoop of good ice cream. Jazz it up with different flavorings or glazes if you’re feeling adventurous. And rejoice in the fact that, if your friends and family are anything like mine, you’re making them very, very happy.

Buttermilk Pound Cake

(I would like to tell you that one day this site will contain beautifully styled food photography, but I'm afraid these hastily taken phone shots are as good as it's gonna get).

1 cup butter, softened
2 cups sugar
4 eggs at room temperature*
3 cups all-purpose flour
1/2 teaspoon baking soda
1/4 teaspoon salt
1 cup buttermilk
2 teaspoons flavoring of your choice (I used vanilla)

1. Cream butter, gradually add sugar, beating at medium-high speed of an electric mixer until well blended (about 5 minutes).
2. Add eggs, one at a time, beating after each addition.
3. Combine flour, soda, and salt; add to creamed mixture alternately with buttermilk, beginning and ending with flour mixture ( I keep my mixer on low when I do this).
4. Stir in flavorings.
5. Pour into greased and floured 10-inch tube pan (I used my bundt pan).**
6. Bake at 325 degrees F (163 degrees C) for 1 hour, or until inserted tester comes out clean.

*I used to ignore this instruction but I've found that room temp. eggs really do make my cakes better. If you've forgotten to take the eggs out of the fridge prior to starting your recipe, just put them in a bowl of barely warm water (not too warm or you'll cook the poor things) for about five minutes. That should do the trick.
**I think this cake would actually be better baked in two loaf pans, asthetically speaking. If you go this route, watch the bake time. I'm guessing it will be about 40 minutes or so.

Friday, August 6, 2010

Black Bean Burgers and "Fries"

As I’ve mentioned before, I was raised by vegetarian parents and didn’t eat meat until I was about twelve or so. I guess you could say that my adolescent rebellion took the form of chicken nuggets and, like most adolescent rebellions, was pretty short-lived. Turns out that my early tofu-filled years resulted in my not really having a strong hankering for meat. I love barbecue ribs and chicken wings, but more often than not I pick the seafood or veggie option if given a choice.

I made these burgers because I wanted a meatless alternative to hamburgers that wasn’t overly processed and filled with all kinds of crazy ingredients. Needless to say, these are not the thing to eat if you’re craving beef (because, obviously, they taste like beans), but if all you’re after is the burger experience (bun, patty, toppings) then give them a try. I’ve been surprised to see how many people have preferred this option when we’ve offered both the bean and beef varieties at barbecues this summer.

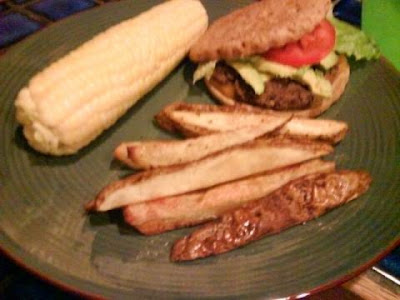
The beauty of this recipe is that it’s very adaptable to your personal tastes. Want spicy burgers? Add a diced jalapeno or chili powder to the equation. Don’t like garlic? Leave it out. I like the mix of spices listed below but if you don’t then feel free to change it up. I usually serve these burgers on Earth Grains thin buns, topped with a spread of either hummus or mayo and some fresh veggies (or sauteed onions and peppers are absolutely divine).

Black Bean Burgers (from food.com)


1 (30 ounce) can black beans, rinsed and drained
1 onion, minced
3/4 cup breadcrumbs
1 garlic clove, minced
1 tablespoon sweet basil
1 teaspoon dried oregano
1 teaspoon ground cumin
2 eggs
salt and pepper to taste

1. Place black beans in a bowl and mash with a fork or potato masher until of desired consistency.
2. Add remaining ingredients and mix well.
3. Divide into 6-8 equal portions and shape into patties.
4. Place patties on a medium-hot grill for several minutes per side.


Oven-Baked Fries
I hesitate even calling this a recipe because it is so simple, but here you go. You can use this same method for Sweet Potatoes as well.

2 medium-sized russet potatoes (or however many you need)
Scant tablespoon olive oil (or enough to lightly coat the potatoes)
Seasoning of your choice (I use Johnny’s seasoning salt).

1)Scrub potatoes well and cut into wedges, strips, whatever you want.
2) Toss potatoes in olive oil until thinly coated and place on a baking sheet. (you may be tempted to just toss the potatoes and oil on the baking sheet but I find that the potatoes get soggy if they have any excess oil on them).
3) Sprinkle liberally with seasoning and bake at 450 degress for 30-40 minutes, or until potatoes are tender on the inside and crispy on the outside.

Friday, June 4, 2010

Pineapple Upside-Down Cake

Prior to making this recipe, I had never had a pineapple upside-down cake. To me they’ve always seemed sort of old school—the kind of thing made by a grandmother who keeps dishes of butterscotch hard candy on her coffee table and collectible porcelain figurines on her bookshelves. Yet somehow I got it into my head that this would be the perfect dessert to take to a LOST finale party last weekend, probably because it is vaguely tropical and as ‘70s as the Dharma initiative itself.

Now that I have made a pineapple upside-down cake, I’m kind of wondering where it’s been all my life. A perfectly moist vanilla cake topped with a layer of caramelized fruit—what’s not to love? I found the recipe, appropriately enough, not on some swanky food blog or website but in my copy of The Joy of Cooking, that classic American cookbook that so much resembles an antique I find it hard to believe the recipes still work. Consider my mind changed on that one.

This recipe calls for maraschino cherries, pecan halves, or prunes as fillers for the holes in the pineapple rings. If you want to go full-out retro, then by all means use the cherries. I used blackberries because they were what I had in my fridge and maraschino cherries make me want to barf. Also because I like to think that the presence of fresh berries helps downplay the kitsch factor and brings pineapple upside down cake—in all its golden, buttery glory—into the 21st century.

Pineapple Upside-Down Cake


7 slices canned unsweetened pineapple rings
9 tablespoons butter, divided
Scant ¾ cup packed brown sugar
Maraschino cherries, pecan halves, prunes, or fresh berries
2 large eggs
8 tablespoons buttermilk, divided
½ teaspoon vanilla
1 cup flour
¾ cup sugar
¾ teaspoon baking powder
¼ teaspoon baking soda
¼ teaspoon salt

1) Drain pineapple and place on paper towel to absorb the excess juice.
2) Melt 3 tablespoons of the butter in a 9 inch cake pan (either in the oven or on the stovetop).
3) When the butter is melted, tilt the pan so that the melted butter coats all sides. The excess will settle in the bottom.
4) Sprinkle brown sugar evenly in the bottom of the pan.
5) Top with pineapple rings and “filler” of choice (if using).
6) Whisk together eggs, 2 tablespoons buttermilk, and vanilla.
7) Mix flour, sugar, baking powder, baking soda, and salt in the bowl of an electric mixer for a few seconds to combine.
8) Add 6 tablespoons softened butter and 6 tablespoons buttermilk and beat on low just until flour is moistened.
9) Increase speed to medium (or high if using a hand-held mixer) and beat for 1 ½ minutes.
10) Add egg mixture a third at a time, beating for 20 seconds and scraping the bowl after each addition.
11) Pour batter over pineapple in pan and bake at 350 for 35-40 minutes, or until a toothpick inserted into center of cake comes out clean.
12) Shake the cake lightly to loosen sides from the pan (I just went around the edges with a butter knife). Let cake cool for at least five minutes before inverting onto serving plate. Serve with loosely whipped, lightly sweetened cream.

Friday, May 28, 2010

Tex-Mex Stuffed Peppers

So I’m going to get a little opinionated here for a second: I think most people eat way too much meat. I’m not saying that we all need to be vegetarians and embrace tofu, but I think the notion that meat should make up the bulk of most meals is downright ridiculous. What’s more, this idea has led to a system of producing cheap meat that is entirely unsustainable and bad for our bodies, the environment, etc.

I am by no means ahead of the curve on this issue, and have really only thought about where my meat comes from in the past year or two, after reading this book and watching this film. Since then I have made an effort to only buy properly raised meat* and adopt Michael Pollan’s philosophy when incorporating it into meals: “eating a little meat isn’t going to kill you, though it might be better approached as a side dish than a main.”

The recipe that follows is perfect for a dinner made following that principle. These peppers are hearty and filling enough to be a meal in themselves, so any meat you serve with them would be a dinner footnote, not the main event. I’m not particularly fond of meat so I’m fine eating these peppers on their own with a salad on the side, but for people like my carnivorous husband a small piece of grilled steak or chicken would serve as a great accompaniment.

I got this recipe from my friend Stefanie, and the original version can be found on her blog here. I modified it both to make it meatless and use the ingredients I had on hand. I served these with some sliced avocado and salsa on top, as well as a little additional sour cream, but they are flavorful enough not to need that kind of embellishment. I guess I just like to gild the lily sometimes.

Tex-Mex Stuffed Bell Peppers
(Sorry, no picture this time. But seeing as the photos I post on here are usually quite ghetto I don't think you're missing much)

1 cup brown rice
½ small yellow or white onion, diced
Olive oil (about a tablespoon)
1 can black beans, drained and rinsed
1 ½ cups frozen corn, thawed
1 Tbs. Chili powder
1 tsp. ground cumin
1 tsp. dried oregano
½ tsp. garlic powder
½ tsp. salt
¼ tsp. pepper
½ cup sour cream (I only used a few tablespoons- just enough to bind the filling)
¼ cup chopped fresh cilantro
4 large bell peppers (preferably red, orange, or yellow)**, trimmed, seeded and cut in half, lengthwise
½ cup shredded Monterey jack cheese.

1) Cook rice according to package directions
2) Saute onion in olive oil over medium heat until transluscent, about 3 minutes.
3) Add dry seasonings, corn, beans, rice, and sour cream to the onions (I sprinkled a little of the cheese in, too). Heat through.
4) Remove pan from heat and add cilantro.
5) Stuff filling into pepper halves and arrange in a greased pan.
6) Sprinkle cheese on top and cover with foil.
7) Bake at 375 for about 30 minutes, or until peppers are soft and cheese is melted. Remove foil for last ten minutes of baking.

*A cost-effective way to buy quality meat is through local farms, like this one. They only sell in bulk though, so I am always looking for people to split these shares with. Let me know if you’re interested.
**Green peppers are actually just red bell peppers that have been picked earlier, so they are less sweet and more tough. I don’t really care for them in this recipe, but that might just be a matter of personal preference.

Tuesday, May 4, 2010

My favorite chocolate cake

This cake is known by many names. I believe the technical term for it is gâteau au chocolat fondant, but in Molly Wizenburg’s book A Homemade Life (which is where I found this recipe), she refers to it simply as “Winning Hearts and Minds Cake.” When I first made this cake for a birthday luncheon, my siblings gave it a less flattering moniker: Ugly Cake.

True, this cake is no beauty queen. Next to the one my sister made--a fluffy white thing covered in clouds of whipped cream and fresh fruit--it did indeed look too brown, flat, and, well, ugly. But then we tasted it. And discovered that underneath that rustic, crackled exterior was a damp, fudgy cake whose texture I can only describe as a mix between a brownie and a souffle. With no icing or frosting to sweeten it up excessively, it tasted only of pure, rich chocolate. I can’t speak for the rest of the family, but for a chocoholic like myself it was pure heaven.

I recently made this cake again for yet another family function. This time around my siblings and I realized it needed a different name--one that conveyed all the deliciousness trapped in that plain package. Here’s what we came up with:

Inner Beauty Cake


7 oz. good quality bittersweet chocolate, finely chopped (look for at least 60% cocoa content)
1 3/4 sticks (7 oz.) unsalted butter, cubed
1 c. sugar
5 large eggs
1 Tbsp. all-purpose flour

1. Preheat the oven to 375F and butter an 8" round cake pan (I used a 9" and it turned out just fine). Line the bottom with parchment paper and butter it as well.
2. Put the chocolate and butter in a microwave safe bowl and melt it in 30 second bursts, stirring often, until smooth (you could also use the double boiler method if you’re more comfortable with that).
3. Once smooth, add the sugar and stir well to incorporate.
4. Set the batter aside to cool for 5 minutes.
5. Once cool, add the eggs one by one, stirring well after each egg ( I find this step easier if the eggs are at room temperature).
6. Add the flour and stir. The batter should be dark and silky.
7. Pour the batter into the prepared pan and bake for 25 minutes, or until the top is crackley, the edges are puffed and the center jiggles only slightly or not at all.
8. Remove the cake from the oven & cool in the pan for 15 minutes. To remove, place a dinner plate over the cake pan & flip it over. The cake will be upside down at this point. Remove the parchment paper, then put another plate on the "top" (which will ultimately be the bottom) of the cake & flip it once more so the “crackled” side is showing.
9. Serve with a dollop of loosely-whipped cream.

Friday, April 30, 2010

Mexican Rice

I wouldn’t consider myself an overly enthusiastic lover of Mexican food, but the number of times that lonestar taqueria appears on my bank statement each month and the many combinations of beans, cheese, tortillas, and vegetables that regularly grace my dinner table would prove me wrong.

This rice is one of the staples in my Mexican food repertoire. I always make it to serve with enchiladas, since all that sauce is just begging to be sopped up by something. You could also serve it alongside tacos or inside one of those huge southwestern burritos. Possibilities are endless here, people.

Mexican Rice (from allrecipes.com)


½ small white or yellow onion, finely diced
About 1 tsp. oil (one turn of the pan)
3 oz. canned diced tomatoes
2/3 cup uncooked long grain rice
1 ½ cups water
½ tsp. chili powder
½ tsp. cumin
1 tsp. salt

1) In a large saucepan, heat oil over medium heat. Stir in onion and saute until translucent.

2) Pour the rice into the pan and stir to coat grains with oil. Mix in cumin, chili powder, tomatoes, salt and water.

3) Cover, bring to a boil then reduce heat to low. Cook at a simmer for 20 to 30 minutes or until rice is done and liquid is absorbed.

Wednesday, March 31, 2010

Hummus

My husband and I are definitely not a match made in culinary heaven. He grew up on hamburger helper and standard “meat and potatoes” fare, while I was raised in a vegetarian household where borscht and homemade sushi made regular appearances on the dinner table.

Our brief courtship was an exercise in compromise. Mike helped me discover a dormant love of barbecue ribs, while I encouraged him to do crazy things like add tomatoes to his turkey sandwiches. Still, after deciding to get married I honestly wondered if his picky eating habits and my love of gastronomical experimentation would ever mesh into a coherent dinner menu.

The turning point came one afternoon shortly after Mike and I got engaged. We were on our way to a Utah football game with friends and stopped at the grocery store for some gametime snacks, one of the selections being a tub of hummus and pita bread. I thought there was no way Mike would touch the stuff with a ten-foot pole, but not five minutes later the guy who won’t eat cream cheese or onions was proclaiming his love for Middle Eastern chickpea spread. Since then he’s been converted to sushi, margherita pizza, curry, and a number of other foods that were previously on the WILL NOT EAT list. Apparently hummus is one heck of a gateway drug.

Hummus


This is a very basic recipe for hummus. I’ve kept the seasoning amounts to a minimum, since you can always put more spices in but you can’t take them out. So just start with these amounts and adjust at the end. This recipe would also be terrific with the addition of some sundried tomatoes or other colorful ingredients. I see a roasted red pepper and kalamata olive variation in my future.

1 (15 oz.) can garbanzo beans
¼ cup tahini (sesame seed paste)
2 tablespoons lemon juice
1 garlic clove, pressed
½ tsp. ground cumin
Salt and pepper to taste

1) Drain garbanzo beans, reserving the liquid.
2) Blend beans, 2 tablespoons of the reserved liquid, and remaining ingredients until smooth. (I used my immersion blender, but you could use a regular blender or food processor)
3) Add liquid until desired consistency is reached.
4) Adjust seasonings to taste.
5) Serve with a drizzle of olive oil and a sprinkling of paprika, if desired.

Thursday, March 4, 2010

My kind of cupcakes

Unlike most people I know, I’m not a huge fan of cupcakes. I definitely have a sweet tooth, but I prefer the richness of cookies or brownies to light cakes topped with tooth-aching frosting. Nor am I much for the whole “food as a craft project” notion (it’s pretty safe to say that I’m the anti-Bakerella), so the thought of baking cupcakes for the sake of decorating them doesn’t hold much appeal, either.

I know the recipe listed below has the term “cupcakes” in the title but you can safely leave behind all notions of buttermilk cake and creamy swirls of powdered sugar-based frosting. A variation of Nigella Lawson’s equally delicious chocolate loaf cake from her cookbook How To Be A Domestic Goddess, these cupcakes are not so much cute and sugary as they are subtly intense and aromatic. They are also ridiculously easy to make (perfect for those as impatient and messy as myself), as the icing is nothing more than a simple ganache spread on top of the cakes and left to set. No pastry bags or sprinkles required.

Chocolate Cupcakes

2 ounces best bittersweet chocolate, melted
½ cup butter, softened
¾ cup plus 2 tablespoons dark brown sugar
1 large egg
½ tsp. vanilla
½ cup boiling water
½ cup flour
½ tsp. baking powder

1) Cream the butter and sugar
2) Add egg and vanilla and beat well
3) Fold in the melted and slightly cooled chocolate. Careful not to overmix- you want the chocolate incorporated, you don’t want a light airy mass.
4) Gently add the flour (to which you’ve added the baking powder), alternately spoon by spoon with the boiling water until you have a smooth, fairly liquid batter.
5) Pour batter into 12 lined muffin tins (each will be about 2/3 full).
6) Bake at 350 for 25-30 minutes.

Let cupcakes cool completely, then frost with the following:

1 ½ ounces milk chocolate
3 ounces bittersweet chocolate (I used about 2 ounces semisweet, 1 ounce bittersweet)
¼ teaspoon vanilla
¼ cup plus 3 tablespoons cream
(Sorry the measurements are a bit screwy, I cut the original recipe in half after discovering that it made enough ganache for an army of cupcakes)

1) Place all ingredients in a heavy-bottomed saucepan and cook over low heat, stirring constantly until the chocolate is melted.
2) Remove from heat and whisk until the mixture is of spreading consistency (it will still be pretty runny compared to regular frosting)
3) Spread onto cupcakes with the back of a spoon
4) Leave to set somewhere cool, although preferably not the fridge.
5) Decorate as you wish (I took Nigella’s suggestion and simply placed one brown M&M in the center of each cake).

Note: If you can, make these the day before and store in an airtight container. They moisten up beautifully and the chocolate flavor really wakes up.