Tuesday, August 23, 2011

Sugar Cookie Bars

Making sugar cookies is one of those activities that is high on my list of Things That Sound Fun in Theory But Usually Just End Up Being a Royal Pain (other items include carving jack-o-lanterns, shopping at thrift stores, and anything involving a sewing machine). At least once every October/December/February, I get to thinking about how it would be oh-so-cute of me to create pumpkin/star/heart-shaped sugar cookies to take to work/neighbors/a party. So I do it. And inevitably end up thinking “never again” as I’m rolling out dough for the millionth time while every surface of my kitchen is covered in either flour or powdered sugar.

The worst part is that, for me at least, all the repetitive rolling, cutting, baking, and frosting don’t really end up being worth it. Sugar cookies are fine and all, but I’d take a simple drop ‘n bake chocolate chip version over them any day of the week and twice on Sunday. In fact, if chocolate chip cookies required that kind of effort I would still make them on a regular basis because that is the kind of love I have for them.

These bars solve both of my sugar cookie issues, since they are both dead simple to make and a whole lot tastier than your average sugar cookie. All the recipe requires is making a simple dough, spreading it into a pan, and baking. No refrigeration, no rolling pins, no cutters. And making the cookies in bar form eliminates the issue of overbaked edges or dry, rolled-too-thin shapes. The end result is dense and buttery without being too heavy, and moist without becoming too light or fluffy. Plus the recipe is incredibly versatile, as you could serve these bars in whole, sheet-cake fashion, or cut and pile them on a plate for a different sort of presentation. Hell, you could even cut the unfrosted bars with cookie cutters and then decorate them if that’s the kind of crazy you’re into.

Sugar Cookie Bars (from the Keeping Up Coookbook)


1 cup butter, softened
8 oz. cream cheese, softened
1 1/2 cups sugar
1 egg
1 teaspoon almond extract
1/2 teaspoon vanilla
1/2 teaspoon baking soda
2 3/4 cups flour

1) Combine butter, cream cheese, and sugar until smooth.
2) Beat in egg, almond extract and vanilla.
3) Add dry ingredients, mixing until just incorporated.
4) With a floured knife (I used an offset spatula) spread dough into a greased and floured 12x17 sheet pan (sometimes known as a jelly roll pan).
5) Bake at 375 for 20 minutes, or until light golden brown on top.
6) Cool and frost with cream cheese frosting (recipe follows).

Frosting:
1/2 cup butter, softened
4 oz. cream cheese, softened
3 1/2 cups powdered sugar
2 teaspoons vanilla
splash of milk
food coloring (optional)

1) Blend butter and cream cheese well
2) Gradually add powdered sugar and beat until smooth.
3) Add vanilla and splash of milk to reach spreadable consistency.
4) Stir in food coloring, if desired.

Wednesday, June 15, 2011

Cilantro Lime Shrimp

I’ve been in a bit of a cooking rut lately. I blame it on the whirlwind that was the month of May, which found Mike and I either out of town, celebrating a birthday or graduation, or grabbing whatever foodstuffs were handy for dinner while frantically preparing for the aforementioned vacations.

June has brought with it not only a return to our more-or-less usual routine, but also weather so beautiful that it seemed criminal to waste it indoors cooking or strolling the aisles of the grocery store. This means that dinner at the Cassity house lately has consisted of such gourmet offerings as egg salad sandwiches, hot dogs, and cold cereal. Aren’t you jealous?

In an effort to try and get my groove back, I dug some shrimp out of the freezer one morning last week, put them in the fridge to thaw, and started looking around for a recipe. This cilantro lime version I found produced flavorful, succulent shrimp that are the perfect balance of salty, sweet, sour, and hot. Served with some quinoa and a green salad, they were a perfectly light summer meal that came together so quickly that we had plenty of time to bask in the outdoors after dinner. Let’s just not talk about how the shrimp actually took two full days to thaw, so that on the night I planned to cook them we once again forewent a decent home-cooked meal and indulged our lonestar taqueria habit instead. That little debacle is entirely beside the point.

Cilantro Lime Shrimp (from The Gourmet Cookbook)

The recipe recommends sauteeing the shrimp, but I thought the smoky flavor of the grill would complement the flavors nicely so I grilled them instead. I’ve included instructions for both cooking methods. Also, these are originally meant to be served as an appetizer, so if you’re looking to serve them as a main course for more than 2 or 3 people I would up the quantities.

3 garlic cloves
1 1/8 teaspoons salt
1/2 cup fresh lime juice
1/4 cup orange marmalade
1/4 cup finely chopped fresh cilantro
3 tablespoons olive oil (plus more if sauteeing shrimp)
1 tablespoon soy sauce
1/2 teaspoon red pepper flakes (adjust to taste)
1/2 teaspoon fresh ground black pepper
1 lb large shrimp, peeled and deveined (The recipe says 20-24 to the pound but I used 25-31 to the pound)

1) Using a large knife, mince garlic cloves and mash to a paste.
2) Mix garlic with 1 teaspoon salt.
3) Whisk together garlic paste, lime juice, marmalade, cilantro, 3 tablespoons oil, soy sauce, red pepper flakes, remaining 1/8 teaspoon salt,and pepper in a small bowl.
4) Transfer 1/3 cup of the mixture to small serving bowl and reserve for dipping sauce.
5) Combine shrimp with remaining mixture in a large sealable plastic bag and seal bag, pressing out excess air.
6) Marinate shrimp in the refrigerator for 15 minutes, turning the bag once halfway through.
7) Drain shrimp and gently pat dry.
8) To grill shrimp: Thread shrimp onto skewers (if they’re wooden skewers make sure to soak them in water for 15-20 minutes beforehand). Place on an oiled grill and cook over medium heat until shrimp are pink on the outside and opaque (about 1 ½ or 2 minutes per side).
To pan fry: Heat 1 1/2 teaspoons oil in a large non-stick skillet over moderately high heat.
Add half the shrimp and cook, turning occasionally until shrimp is cooked through, about 3 minutes total. Transfer to a platter and cook the remaining shrimp in 1 1/2 teaspoons of oil.
9) Garnish with cilantro and serve with dipping sauce.

Tuesday, May 24, 2011

Chocolate Hazelnut Ice Cream Sandwiches

The last time I posted on this blog, I was all about the chocolate and peanut combination. Well, now it’s time to talk about its more subtle, sophisticated cousin, the one I love most of all: chocolate and hazelnut.

My first introduction to this combo was the ferrero rocher chocolates my mom always bought for Christmas, and oh man did I fall hard for those. Then came nutella, that European chocolate hazelnut spread that puts peanut butter to shame. I still remember eating it in a giant crepe with bananas on the street in Paris. Perfection. But it’s also pretty good on toast or eaten by the spoonful out of the jar. Basically what I’m saying is that I would eat this stuff if it were spread on cardboard.

And now that you know of my undying love of all things chocolate and hazelnut, let’s talk about these ice cream sandwiches. I was given the recipe posted below by my older brother and forgot all about it for a couple of years until I recently cleaned out my recipe folder. I had some chocolate wafers left over from making an icebox cake and, as fate would have it, the same brother who asked me to make them in the first place had recently returned home from grad school in Switzerland and I figured he was due a “welcome home” treat.

So I made these ice cream sandwiches and fell head-over-heels in love. A stellar combination of barely sweet dark cookies, crunchy hazelnuts, smooth chocolate ice cream, and the aforementioned nutella, these chic little frozen treats are the dessert equivalent of those small, elegant cups of after-dinner espresso. They are also the ultimate example of the “quality over quantity” mantra, as one of these tiny sandwiches feels more indulgent and satisfying than a giant Fat Boy. But that’s not to say I’ll judge you for eating two. Heaven knows the terms “restraint” and “nutella” don’t really pair well in my world.

Chocolate Hazelnut Ice Cream Sandwiches (from Better Homes and Gardens, Sept. 2008)

When I made these I totally ignored the instructions and just spread the nutella to my liking, smeared the ice cream all willy-nilly between the cookies, and pretty much made a giant mess. The end result was good but inconsistent. You couldn't taste the nutella in some of the sandwiches, and the ice cream didn't look very pretty. I would suggest learning from my rebel ways and following the directions instead.

16 chocolate wafer cookies (I used nabisco brand but you can also make your own)
1/3 cup chocolate hazelnut spread (nutella)
1 pint premium chocolate ice cream (I used Haagen Dazs)
1/3 cup chopped toasted hazelnuts*

1) Spread flat side of each wafer with nutella; set aside.
2) Scoop 8 ice cream balls, about 3 tablespoons each, and keep in freezer until ready to assemble.
3) To assemble sandwiches, remove ice cream balls from freezer and allow to soften for one minute.
4) Place 1 ice cream ball on each wafer and top with remaining wafer; press gently together.
5) Sprinkle edges with nuts. Place sandwiches on baking sheet lined with wax paper and freeze for 3 hours, or until firm. To store, freeze up to 2 weeks in self-sealing plastic bags.

*To toast and skin hazelnuts, spread nuts in a single layer on a baking sheet and bake at 350 for 5-10 minutes until skins crackle. Wrap hazelnuts in a clean towel and let steam for 5-10 minutes. Rub hazelnuts in towel until skins flake off.

Tuesday, April 26, 2011

Squirrel Bars

There are few combinations more universally popular than the pairing of chocolate and peanut butter. And there are few examples of this pairing that I love more than squirrel bars. A favorite of my family’s , these cheekily named bars are essentially a peanut butter blondie with swirls of melted semi-sweet chocolate running across the top. They are a perfect combination of salty and sweet and, though they are fairly rich, they impart a generous dose of chocolate and peanut butter flavor without evoking the mouth-filling heaviness of, say, a Reese’s peanut butter cup.

I actually can’t believe it’s taken me this long to post about these, since they are frequently my go-to recipe when someone asks me to bring a treat to a shower, open house, etc. Squirrel bars look a little fancier than your typical brownie or cookie, but are easy and quick to make. Perfect for when you want to change things up a bit but don’t have a lot of time to make anything elaborate. Just be careful serving them to children, since word on the street is that they all have deathly peanut allergies these days.

Squirrel Bars (from the Ivory Favorites cookbook)

1/2 cup creamy peanut butter
1/3 cup softened butter
3/4 cup sugar
3/4 cup brown sugar
2 eggs
2 tsp. vanilla
1 cup flour
1 tsp. baking powder
6 oz. semi-sweet chocolate chips

1) Cream together first four ingredients.
2) Add eggs and vanilla and beat until well blended.
3) Stir in flour and baking powder.
4) Spread dough in a greased 9x13 pan and sprinkle with chocolate chips.
5) Bake at 350 for 3 minutes, or until chocolate chips are nice and melted, like this:
6) Remove from oven and marbelize by dragging a butter knife or similar utensil (I use a chopstick) through the chocolate chips, like so:

Until they look like this:
7) Return the bars to the oven and bake for another 18-20 minutes, or until bars are a pale golden brown and set (mine usually don't take that long, so start checking after like 15 minutes).


*Don't be tempted to substitute milk chocolate chips- they don't impart enough chocolate flavor. Also, every time I have made these with chocolate chips that have been sitting in my pantry for quite some time, the end result isn't quite as pretty, since the chips don't melt enough to be marbelized. So if you're looking to achieve the result pictured above, use fresh chocolate chips (one sure sign that chocolate chips are old is if they are kind of white on the outside).

Tuesday, April 12, 2011

Mediterranean-ish Pasta Salad

This is what I like about pasta salads: they’re easy to make and adapt to your tastes, they can be prepared ahead of time, and they are a relatively inexpensive yet filling dish to serve at a party, shower or other such function where you want to feed people without spending too much money. This is what I don’t like about pasta salads: just about everything else.

Maybe this is because when I think of pasta salad I immediately picture a bland mixture of tri-color pasta, broccoli, and black olives drenched in overly sweet Italian dressing, but even as I type that I realize that even the most artisan cold pasta creations from Tony Caputo’s don’t really do it for me. Don’t get me wrong, I’ll eat pasta salad (I’ll eat just about anything, really) but it’s never something I go out of my way to procure. I guess at the end of the day I just prefer my pasta served hot (preferably drenched in some kind of tomato cream sauce) and my salads to consist primarily of vegetables.

But like most of my deeply held convictions, I eventually came across an exception to my apathy toward pasta salad. It came in the form of a Mediterranean style pasta salad that my older sister created for a family dinner, and which I have susequently adapted and made for a handful of bridal showers, book club gatherings, etc. In my opinion, what sets this pasta salad apart is the homemade Italian dressing and the way it mingles with the oil of the sun-dried tomatoes and artichoke hearts to create a complex blend of flavors; the high ratio of other ingredients to the pasta (of course, if you like more pasta you can always change this aspect of the recipe, but I prefer more of the other stuff); and the use of whole wheat pasta, which lends a nutty depth to the dish. If there were ever a reason to reconsider my culinary opinions, this pasta salad is it.

Elena's Pasta Salad


When I made this pasta salad for a book club last week, I had every intention of measuring out the ingredients and writing everything down, since people often ask for the recipe and I’m tired of responding with, “well, you just kind of throw a bunch of stuff together…” But life happened and I did end up just throwing everything together in a hurry, like always. So just use these measurements as very loose guidelines and go with whatever ratio looks right to you. As mentioned above, I like to have an equal amount of pasta and non-pasta ingredients, but do whatever you like.

Also, some of the ingredients in this salad might sound fancy but they are actually a Costco shopper’s dream because they stay good for years. I bought big jars of artichoke hearts, sundried tomatoes, and kalamata olives at Costco for a good price and now they just sit in the back of my fridge until I need them.

1 pound whole wheat spiral pasta
About 1 cup artichoke hearts marinated in oil (not canned), quartered
About ¾ cup kalamata olives, pitted and halved
About ½ cup sundried tomatoes, sliced
About 8 oz. fresh mozzarella, cut into bite-sized cubes
About ¾ cup diced tomatoes (I had some baby heirloom tomatoes on hand, so I just used those cut in half)
1 ripe avocado, diced
About ½ cup Italian Dressing (recipe follows)

1) Cook pasta according to package directions and allow to cool to room temperature.
2) Once pasta is cool, place in a bowl with remaining ingredients and stir to combine. If making a day ahead, wait to stir in avocado and dressing until just before serving. Keep refrigerated.

Italian Dressing (via food.com)
3/4 cup vegetable oil
1/4 cup cider vinegar
2 tablespoons water
1 teaspoon minced garlic
2 teaspoons sugar
1 1/2 teaspoons salt
1/4 teaspoon pepper
1 teaspoon grated parmesan cheese

Combine all ingredients in a bottle. Shake to blend. Allow flavors to blend about an hour or so, Will even be more flavorful the following day. Be sure to refrigerate any leftovers.

Tuesday, March 15, 2011

Black and White Cookies

I’m pretty bad when it comes to picking favorites. If you asked me to name my favorite food or favorite book, I would probably bombard you with an endless list of options that could all be considered my top choice. But there is one category in which I could easily pick a favorite, and that’s TV sitcoms. As far as I’m concerned, Seinfeld is by far the greatest sitcom ever made; it’s original, clever, and downright hilarious. Fellow Seinfeld fans may remember the episode in which Jerry and Elaine go to a bakery together and Jerry waxes philosophical about black and white cookies (“look to the cookie”) before eating one makes him sick. If you don’t remember this episode or haven’t seen it, you can catch the highlights here.

According to this New York Times article, Seinfeld solidified the black and white cookie’s status as one of New York’s trademark foods. I actually never encountered a black and white cookie in the times I visited The Big Apple (which is surprising, because I hit the city’s bakeries and I hit them hard) so my first encounter with this iconic pastry was a small, delicate version at a local bakery called Les Madelines that bore little resemblance to the black and white cookie of Seinfeld fame. I’m guessing it’s what black and white cookies would look like in France.

The first time I tasted a real black and white cookie ended up being when I baked them from a recipe found in my Gourmet cookbook last weekend. I could tell from the outset that the black and white would be my type of cookie: a soft, cakey base topped with a simple glaze that imparts a striking visual appeal without being too showy or cute. And while I’m usually a chocolate whore, I found myself enjoying the vanilla side equally (although the two flavors are really best when eaten in the same bite). These cookies may not hold the secret to racial harmony as Jerry claims, but they sure do wonders for a girl’s sweet tooth.

Black and White Cookies (adapted from The Gourmet Cookbook)


When I first made these, I followed the orginal recipe's specifications for cookie size and made them huge. The second time around I went for a medium version (pictured above), which I am more partial to simply because the large ones are a little much unless you're really committed to eating a cookie. But feel free to go with your own preference because I've included directions for both.

The other change I made in this recipe involve the icing, as I'm not too fond of lemon in my baked goods and I thought the process could be a little less hassle-free. I recommend making one of the icings first and frosting the cookies with it before making the other one so that neither one of the icings has a chance to solidify in the bowl.

cookies:
1 1/4 cups all-purpose flour
1/2 teaspoon baking soda
1/2 teaspoon salt
1/3 cup well-shaken buttermilk
1/2 teaspoon vanilla
1/3 cup (5 1/3 tablespoons) unsalted butter, softened
1/2 cup granulated sugar
1 large egg

Vanilla icing:
3/4 cup confectioners sugar
1/2 tablespoon light corn syrup
1/4 teaspoon vanilla
1 to 2 tablespoons hot water

Chocolate icing:
3/4 cup confectioners sugar
1/2 tablespoon light corn syrup
1/8 teaspoon vanilla
1 to 2 tablespoons hot water
1/4 cup unsweetened Dutch-process cocoa powder

1) Whisk together flour, baking soda, and salt in a bowl. Stir together buttermilk and vanilla in a cup.
2) Beat together butter and sugar in a large bowl with an electric mixer until pale and fluffy, about 3 minutes, then add egg, beating until combined well.
3) Mix in flour mixture and buttermilk mixture alternately in batches at low speed (scraping down side of bowl occasionally), beginning and ending with flour mixture. Mix until smooth.
4) For large cookies: Spoon 1/4 cups of batter about 2 inches apart onto a buttered large baking sheet. Bake in middle of oven at 350 until tops are puffed and pale golden, and cookies spring back when touched, 15 to 17 minutes.
For medium cookies: Spoon about 2 tablespoons of batter 2 inches apart onto a buttered large baking sheet. Bake for about ten minutes, or until cookies spring back when touched.
5) Transfer with a metal spatula to a rack and chill (to cool quickly), about 5 minutes (or you could just let them cool at room temp before you frost them if you have the time).
6) When cool, turn cookies flat sides up, then spread white icing over half of each and chocolate over other half (recipe follows).
7) Once cookies are iced, let them sit at room temperature for an hour or so, or until the glaze has set. Store in an airtight container in between sheets of waxed paper.

Vanilla icing:
3/4 cup confectioners sugar
1/2 tablespoon light corn syrup
1/4 teaspoon vanilla
1 to 2 tablespoons hot water

Chocolate icing:
3/4 cup confectioners sugar
1/2 tablespoon light corn syrup
1/8 teaspoon vanilla
1 to 2 tablespoons hot water
1/4 cup unsweetened Dutch-process cocoa powder

For vanilla icing: Stir together confectioners sugar, corn syrup, and 1 tablespoon water in a small bowl until smooth (you want it to be the consistency of thick Elmer's glue, so add more or less water accordingly).

For chocolate: Same process as vanilla, only add cocoa in as well and use more hot water to thin to the same consistency as the vanilla icing.

Friday, March 11, 2011

Green salad with beets, goat cheese, and candied pecans

As far as restaurants go, I am neither here nor there on the subject of The Cheesecake Factory. I know people who absolutely love this place and others who dismiss it as totally overhyped. I fall into neither camp, and consider Cheesecake Factory one of those places that I wouldn’t choose if the restaurant decision is up to me, but I’m perfectly fine with eating there should someone else pick it.

I can, however, recall a time when I had a pretty terrible experience at this restaurant. We went there with my in-laws and had to wait an unreasonable amount of time for a table (even by Cheesecake Factory standards), Mike’s meal arrived stone cold, and the salad I ordered wasn’t anything to write home about. It was called the french country salad or something like that and the description on the menu sounded right up my alley: greens tossed in a vinegarette dressing with roasted beets, pecans, and goat cheese. However, when the salad arrived it was swimming in dressing, the beets were mushy, and the goat cheese was limited to two small dabs (unusual for a restaurant that prides itself on huge portions).

As awful as the execution of this salad was, I still liked the idea of the ingredients together so when I found myself with both beets and goat cheese that needed to be used up, I decided to create my own version of it. I did a bit of googling to get ideas and it turns out that there are tons of variations of this salad out there. I drew inspiration from a few of the recipes and ended up with a simple salad that far exceeded the verison I sampled at Cheesecake Factory in every aspect except for the fact that I couldn't order a piece of white chocolate raspberry cheesecake after I finished it.

My version of the French Country Salad

I always feel like writing out quantities in salad recipes is kind of a waste since it’s tough to measure it out and you should really just go by how much of each ingredient you want in the finished product. So the quantities below really are just guidelines. And if you have some roasted asparagus on hand, I think it would make a great addition to this salad.

Even though I usually dismiss individual plating as too fussy, it really does work better for this salad. The first time I experimented with making it I made a huge bowl for my family’s Sunday dinner and it didn’t work too well because you really want a good balance of the ingredients and the dressing to thoroughly coat the salad and beets, which is harder to do in a large bowl than individual plates.

Salad:
2 medium beets, scrubbed
Olive oil
Sea salt
~6 cups salad greens
~4 oz. goat cheese

Candied Pecans:
2 cups pecans
1 tablespoon melted butter
½ cup brown sugar
½ tsp. vanilla

Dressing:
¼ cup olive oil
¼ cup balsamic vinegar
½ tablespoon honey

1) Make candied pecans by tossing the nuts with the butter and vanilla, then adding the brown sugar and stirring to coat the nuts.
2) Bake pecans on a foil-lined baking sheet at 375 for about 15 minutes, stirring halfway through. I would start checking them after ten minutes because the sugar can burn quickly. Once the nuts are golden brown and the sugar has solidified, remove them from the oven. Let cool completely.
3) Rub each of the beets lightly with olive oil and sprinkle with some salt. Wrap in tin foil and place on a baking sheet. Bake at 375 for about an hour (longer or shorter depending on the size of your beets), or until a fork goes through them easily.
4) Allow beets to cool, then peel and dice into small pieces.
5) Make dressing by whisking ingredients together. Drizzle desired amount of dressing over beets and greens and toss.
6) Divide salad evenly among plates and top with crumbled goat cheese and pecans.

Monday, March 7, 2011

Tomato Soup

So remember how a little while ago I wrote about some blue cheese crackers that I was eager to eat with a bowl of tomato soup? Well, after I wrote that sentence I couldn’t get the idea out of my mind but there was one teeny problem with executing this plan, namely that I didn’t have a great tomato soup recipe.

The issue that I have with most tomato soup is that it is way too rich and intense to be enjoyed by the bowlful. It works well as a dipping sauce for grilled cheese sandwiches or breadsticks but that’s about it. I’ve found a few exceptions to this generalization, one of which is the tomato bisque posted below.

I found this recipe on a food blog and was immediately intrigued by the inclusion of butternut squash puree. In the same way that the potato in that broccoli cheese chowder recipe added some depth and thickness to that soup, so does the squash in this tomato one. It doesn’t add a particular flavor but keeps a soup that can easily become reminiscent of pasta sauce firmly anchored in spoon-and-bowl territory. Which isn’t to say that it wouldn’t be great paired with a grilled cheese sandwich, but for someone who wanted to enjoy her soup with just a few crackers, it was a perfect fit.

Tomato Bisque (adapted from melskitchencafe.com)


I made a couple of changes to the original recipe, posted here. The first was to reduce the amount of sugar it called for. I added half the original amount (1 tablespoon) when I first made it and I found that it gave the soup a sweet flavor that was totally not what I was going for. So from now on I'm just going to add enough sugar to take some of the acidic bite out of the tomatoes. I also switched up the cooking directions a bit so more flavor from the various seasonings gets infused into the soup.

1 medium butternut squash (for about 1 1/2 cups cooked squash)
1 tablespoon butter
¼ cup finely diced onion
3 cloves garlic, finely minced
1 can (14.5 ounces) Italian-style stewed tomatoes (or 1 can stewed tomatoes with 1 ½ teaspoons Italian seasoning)
1 cup chicken stock ( I used broth)
1 teaspoon salt
½ teaspoon sugar
1 teaspoon dried basil
1 cup nonfat half-and-half (I used 1% milk and it worked beautifully)
Tapatio or other hot sauce to taste

1) Cut the butternut squash in half, lengthwise, so you have two long pieces. Scoop out the seeds and pulp from each half.
2) Place both sides cut-side down in a 9X13-inch pan. Add enough water to come about 1/4-inch up the sides of the squash. Cover with foil and bake at 350 for about an hour, or until squash is very tender when pierced with the fork in several places. If the flesh doesn’t easily give to the pressure of the fork, continue cooking in ten minute increments, and testing again, until the squash is tender.
3) Remove the pan from the oven and transfer the squash to a large cutting board or plate. Let it cool about 15 minutes before scooping out the flesh. If preparing the day before, scoop out the flesh and place in a tupperware. Let cool completely. Cover and refrigerate until using it in the soup. If using the squash immediately, scoop the squash into the blender.
4) While the squash is cooking, in a medium saucepan, melt the butter over medium heat and saute the onion until soft and translucent. Add the minced garlic and cook, stirring constantly, until fragrant, about 30 seconds. Add the tomatoes, chicken broth, salt, basil, and sugar and let simmer for about ten minutes.
5) Add the tomato mixture to the squash in the blender (or, if you have an immersion blender, add the squash to the tomato mixture and blend in the pot). Process until smooth. Pour the blended mixture back into the saucepan and add the half and half or milk. Heat over medium-low until the soup is warm (but don’t let it boil or simmer to avoid the cream curdling). Serve immediately and add hot sauce to taste, if desired.

P.S.- I also tried Mel's split pea and barley soup last week and it was delicious. Highly recommended.

Thursday, March 3, 2011

Caramelized Onion and Goat Cheese Tart

I first had this savory tart when my friend Carly served it at a Christmas party she hosted this year. The moment I tasted this combination of sweet onions, salty cheese, and buttery puff pastry crust I immediately thought that I needed to get the recipe. This tart strikes me as a kind of elegant appetizer; the type of thing to serve at a function where you don't need to provide a full meal but want to have something more substantial than crudites or cheese and crackers on hand.

I ended up serving it on Sunday when we had friends over to watch the Oscars. This tart, along with some nutella-filled crepes, almost helped me get over what a lame snoozefest the Oscars were this year.


one box frozen puff pastry
1 large red onion
1 tablespoon butter
1 tablespoon brown sugar
1/2 tsp. salt
4 ounces plain goat cheese
4 ounces cream cheese
1/3 cup heavy cream
1 tablespoon minced rosemary

1) Thaw frozen puff pastry on the counter, according to package directions (I think this takes about 40 minutes).
2) Slice 1 large red onion. Melt 1 tablespoon of butter and 1 tablespoon of brown sugar in a large skillet over medium heat.
3) When the sugar has melted, add the onion and sprinkle with salt. Cook and stir over medium until the onion is soft and starting to brown (about 15-20 minutes). Set aside.
4) Mash together goat cheese, cream cheese, and heavy cream. (This is easiest if both cheeses are at room temperature.)
5) Unwrap the puff pastry sheets, unfold them, and place on parchment-lined baking sheets. Pierce all over with a fork.
6) Spread cheese mixture over each sheet, leaving a 1-inch border around the edges. Mince 1 tablespoon of fresh rosemary and sprinkle evenly over the cheese, then distribute the caramelized onions evenly.
7) Bake at 450 for 15 minutes, until the edges are puffed and golden.

Wednesday, March 2, 2011

Tortellini Soup

In a display of traditional gender roles that would make 1950s housewives proud, I’m the one who does most of the cooking at the Cassity home. I’m sure Mike would be happy to fill this role, but I love to cook and he doesn’t so why force it on him in the name of feminism is what I say. And since he doesn’t cook the meals he’s in charge of the cleanup afterward, which is kind of a nice trade-off in my opinion.

Lately I’ve tried to put more effort into planning our meals so I’m not left making a bunch of last-minute grocery trips or just giving in to the temptation of eating Lonestar fish tacos every night (living close to that place is dangerous). Usually I make a weekly dinner plan and include one or two more indulgent, made-from-a-recipe-I’ve-been-wanting-to-try meals. These are the kind of things, like chicken tikka masala or broccoli cheddar chowder, that usually end up posted on this blog. The other meals we have are usually just a pinch-of-this, sprinkle-of-that kind of affair and are pretty basic and wholesome.

I like to think of the soup posted below as a combination of these two meal philosophies. It includes sausage and tortellini to provide some richness and fat, but these two ingredients are suspended in a simple broth of good-for-you veggies. And while this is a recipe from a cookbook, it’s essentially just a guide and can be modified to accommodate whatever changes you want to make. Truly the best of both worlds.

Tortellini Soup (from the Ivory Favorites cookbook)
I didn’t have apple juice or white wine on hand when I made this so I just substituted water, but I think it could have used that dimension of flavor so I’ll be sure to have it next time. I also had a lot of baby spinach on hand so I stirred a couple of handfuls into the soup when it finished cooking. And if I were the only one eating this I also would have omitted the sausage but Butch loves himself some meat so here we are.

1 pound mild Italian sausage
1 onion, chopped
2 gloves garlic, minced
1 cup water
2 (13 3/4 oz) cans beef broth (I use Better Than Bullion Beef Base)
1/2 cup white wine or apple juice
3 carrots, sliced
1 (28-ounce) can crushed tomatoes
1 teaspoon basil
1 teaspoon oregano
1 cup sliced zucchini
4 tablespoons parsley, chopped
1 green pepper, chopped

1) In large soup pan, brown sausage.
2) Drain fat and add chopped onion and garlic and cook until tender
3) Add broth, water, wine, carrots, tomatoes, basil, oregano, zucchini, parsley and green pepper.
4) Simmer for 30 minutes or longer.
5) Add tortellini 5 to 10 minutes before serving and cook until tender, but not soggy.
6) Garnish each serving with parmesan cheese

Tuesday, February 22, 2011

Mac and cheese, two ways

A couple of summers ago I lived in Sitka, Alaska. My culinary memories of this time mostly revolve around the delicious seafood that was in abundant supply there (if you haven’t eaten salmon or halibut within an hour of it being caught, then I would recommend adding that experience to your bucket list), but the other food that I associate with that time in my life is mac and cheese.

For some reason my roommates and I all developed quite the blue box fetish that summer. Perhaps it can be attributed to the fact that the summer in Sitka was the coldest and rainiest we’d ever experienced and mac and cheese was the cheapest and quickest form of comfort food, or maybe this phenomenon was just a result of it being available in bulk at the otherwise understocked grocery stores. Whatever the cause, the point is you could usually find one of the inhabitants of our apartment preparing a box of Kraft macaroni and cheese on any given day.

I usually reserved my weekly mac and cheese meal for Sunday afternoons after church. I would come home, change into some comfy sweatpants, and whip up some chemically altered cheese and noodles. In this process I discovered that I like my mac and cheese creamy. As in swimming in cheesy sauce. This means that when I prepared it from a box I would usually add more milk and sometimes a little more butter to achieve that consistency. It also means that for years I never had a homemade version of macaroni and cheese that I truly loved.

See, most homemade versions of mac and cheese that I’ve come across are of the baked variety, meaning they are made by making a roux and adding milk, cheese and seasonings to it, then stirring the cooked noodles in and baking the whole shebang in the oven. This approach has never really done it for me, as the outcome tends to be a firmer, more casserole-type dish. And even though some recipes recommend just eating the pasta and sauce before baking if you like a more creamy approach, I find that somehow there is a floury taste that carries over from the roux.

I found my mac and cheese salvation in Alton Brown’s stovetop recipe. This approach produces that creamy texture I love without using ultra-processed ingredients. It’s also super easy and is my favorite way to make mac and cheese. However, I live with a husband whose macaroni and cheese preferences differ significantly from mine in that he actually likes the baked stuff, preferably with crushed ritz crackers sprinkled on top (what the?) So for dinner one night I kept his preferences in mind by making some baked mac and cheese from a recipe that came highly recommended. He loved it, and, while I didn’t really care for it all that much, I can safely blame that on my personal preferences and not any flaws in the recipe. So here are both recipes for your consideration:

Baked Macaroni and Cheese (adapted from the Ivory Favorites cookbook)

I honestly think I would like this recipe if the sauce amounts were doubled. But then the butter and cheese amounts are doubled too so that kind of becomes a hard pill to swallow. Yet chances are that if you’re eating mac and cheese you’re in an indulgent mood in the first place so perhaps there’s no need to worry about it.

1 pound macaroni ( I used spiral pasta instead)
1/4 cup butter
4 tablespoons flour
2 cups milk
1/4 teaspoon dry mustard
½ teaspoon salt
¼ teaspoon pepper
Dash of hot sauce (I like siracha)
3 cups grated Cheddar cheese (medium or sharp)
~1/2 cup crushed Ritz crackers (optional)

1) Cook macaroni in boiling, salted water according to package directions and drain.
2) In large saucepan, melt butter. Add flour and stir. Pour in milk and cook, stirring constantly, until thick.
3) Add salt, pepper, and dry mustard, and then add 2 1/2 cups of cheese and stir until cheese is melted. Remove from heat and add cooked macaroni and mix together.
4) Pour into buttered 9" x 13" square baking pan, sprinkle remaining 1/2 cup cheese on top (and Ritz cracker crumbs, if using). Bake at 350 degrees for 30 minutes.

Stovetop Macaroni and Cheese (from Alton Brown via foodnetwork.com)
1/2 pound elbow macaroni
4 tablespoons butter
2 eggs
6 ounces evaporated milk
1/2 teaspoon hot sauce
1 teaspoon kosher salt
Fresh black pepper
3/4 teaspoon dry mustard
10 ounces sharp cheddar, shredded (I prefer medium)

1) In a large pot of boiling, salted water cook the pasta to al dente and drain. Return to the pot and melt in the butter. Toss to coat.
2) Whisk together the eggs, milk, hot sauce, salt, pepper, and mustard. Stir into the pasta and add the cheese. Over low heat continue to stir for 3 minutes or until creamy.

Friday, February 11, 2011

Some Simple Valentines Day Treats

I love Valentines Day. Always have. Even when I was single and didn't have anyone buying me flowers or taking me out to fancy restaurants. I just think that celebrating love in any of its forms is a good thing. Plus Valentines Day is a true chocoholic's dream, which is why I'm surprised that only one of the recipes below contains chocolate (and even then it's a humble rolo), but I guess that's because most of these treats were made with other people in mind. I think my own sweet tooth will be satisfied when I make my favorite chocolate covered strawberries this weekend.

Homemade Marshmallows (Gourmet, December 1998 via epicurious.com)

I mentioned these little guys in my previous post. Although I've never been too big on marshmallows, I have to say that I much prefer these to the store-bought version. They are light, fluffy, and perfectly sweet. Plus they were really fun to make, at least if your idea of fun is watching a sticky mess of gelatin and sugar syrup whip up into white fluffy deliciousness right before your very eyes. I cut these out with a small heart-shaped cookie cutter to make them festive, but if you really wanted to up the V-Day factor you could add a small amount of red food coloring to the marshmallow batter to make them pink. Oh, and I should probably tell you that these were fantastic dipped in chocolate (but really, what isn't?)

about 1 cup powdered sugar
3 1/2 envelopes (2 tablespoons plus 2 1/2 teaspoons) unflavored gelatin
1/2 cup cold water
2 cups granulated sugar
1/2 cup light corn syrup
1/2 cup hot water (about 115°F.)
1/4 teaspoon salt
2 large egg whites*
1 teaspoon vanilla

1) Oil bottom and sides of a 13- by 9- by 2-inch rectangular metal baking pan and dust bottom and sides with some powdered sugar.
2) In bowl of a standing electric mixer or in a large bowl sprinkle gelatin over cold water and let stand to soften.
3) In a 3-quart heavy saucepan cook granulated sugar, corn syrup, hot water, and salt over low heat, stirring with a wooden spoon, until sugar is dissolved. Increase heat to moderate and boil mixture, without stirring, until a candy or digital thermometer registers 240°F., about 12 minutes. Remove pan from heat and pour sugar mixture over gelatin mixture, stirring until gelatin is dissolved.
4) With standing or a hand-held electric mixer beat mixture on high speed until white, thick, and nearly tripled in volume, about 6 minutes if using standing mixer or about 10 minutes if using hand-held mixer.
5) In a large bowl with cleaned beaters beat whites (or reconstituted powdered whites) until they just hold stiff peaks. Beat whites and vanilla into sugar mixture until just combined.
6) Pour mixture into baking pan and sift 1/4 cup confectioners― sugar evenly over top. Chill marshmallow, uncovered, until firm, at least 3 hours, and up to 1 day.
7) Run a thin knife around edges of pan and invert pan onto a large cutting board. Lifting up 1 corner of inverted pan, with fingers loosen marshmallow and let drop onto cutting board. With a large knife trim edges of marshmallow and cut marshmallow into roughly 1-inch cubes.
8) Sift remaining confectioners' sugar into a large bowl and add marshmallows in batches, tossing to evenly coat.

Marshmallows keep in an airtight container at cool room temperature 1 week.


Red Velvet Cupcakes

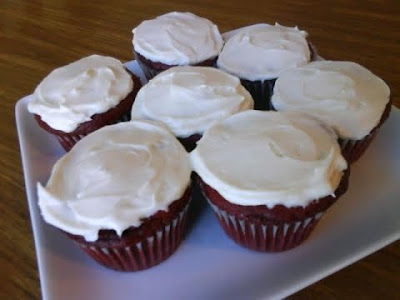
I know that red velvet cake is probably the most overdone Valentines Day dessert out there but I can never resist it so I made these cupcakes for a friend's birthday this weekend. Well, I actually intended to make these whoopie pies but then the laziness factor kicked in so I considered making whoopie pies from cake mix instead but eventually ended up just baking a quick batch of cupcakes. Yes, I did stray from my "always bake from scratch" ethos on this one but I figure that most red velvet recipes call for about a full bottle of red food coloring anyway so using a cake mix isn't that big of a deal. I do, however, insist on homemade frosting. Frosting from a can is a sad, sad thing.

1 Red Velvet cake mix (Duncan Hines brand is best)
1 small box instant chocolate pudding mix
1 cup sour cream
4 eggs
½ cup vegetable oil
½ cup water.

1) Using either a stand or hand-held electric mixer, mix all ingredients on medium speed for 3 minutes.
2) Spoon into paper-lined muffin tins (fill about 2/3 full) and bake at 350 for about twenty minutes, or until a toothpick inserted into the center comes out clean.

Frost with one of the following (I much prefer the cream cheese version- I only made the vanilla cause the birthday girl preferred it.)

Cream Cheese Frosting
1 stick butter, softened
8 oz. cream cheese, softened
2-4 cups sifted powdered sugar (depending on how sweet and thick you want the frosting to be- taste as you go)
2 tsp. vanilla

1) Beat butter and cream cheese together
2) Add sugar and vanilla and beat until of spreading consistency.

Vanilla Buttercream Frosting
1 stick butter, softened
4 cups sifted powdered sugar (depending on how sweet and thick you want the frosting to be- taste as you go)
2 tsp. vanilla
1/4 cup milk

1) Cream butter, then add the sugar and beat for a minute or two.
2) Beat in milk and vanilla. Add more milk if necessary to achieve desired spreading consistency.

Pretzel/Rolo/Peanut Butter bites

I wasn't sure what to call these things. I considered "homemade Take 5", since their ingredients are essentially the same as the candy bar, but that didn't really fit. Neither does the term "pretzel turtle", which is what these are called should you choose to put a pecan in the middle instead of the M&M. Honestly, given their perfect blend of sweetness and salt I would say they should be called PMS lifesavers. But I don't think I'll refer to them by that name when I hand these out to co-workers on Monday.

Checkerboard pretzels
Rolos, unwrapped
Peanut butter M&Ms

1) Place pretzels on a baking sheet and put one unwrapped rolo on top.
2) Bake at 300 degrees for about 4 minutes, or until Rolo is fairly melted.
3) Remove from oven and let cool for 1 minute, then place M&M on top.
4) Let sit for about an hour, or until chocolate hardens.

If you're looking for a more sophisticated Valentines Day treat, might I suggest these cupcakes? And these molten chocolate babycakes would be a perfect ending to a romantic dinner for two.

Hope all of you have a happy Valentine's Day!

Thursday, February 10, 2011

Irish Blue Crackers

Monday night was one of those nights where I cooked just for the fun of it. It was snowy and cold outside, Butch was at school, and I suddenly felt the need to make something more fun and whimsical than the tofu and veggie stir-fry I had planned for dinner that night. So I went ahead and whipped up some homemade marshmallows (which I will tell you about later) and, because I was on a roll and still had an hour to kill before I needed to start the stir-fry, went ahead and made these crackers too.

The cool thing about making things like marshmallows and crackers from scratch is that, for me at least, these are the kind of items usually purchased in boxes and bags from the grocery store and produced using unknown methods in distant factories. Creating them in your very own kitchen feels like solving a mystery or starring in your very own episode of Unwrapped. There is also something to be said for cooking with no other intent than to fulfill your curiosity about how a certain food is made. A truly indulgent first-world form of therapy to be sure, but I recommend it nonetheless.

Now how exactly did these crackers turn out, you ask? I loved them but if you’re expecting the crunch of wheat thins or saltines then look elsewhere. These crackers are more like a flat, slightly crispy version of a buttery, flaky biscuit. The inclusion of blue cheese adds just the right amount of flavor without being overpowering (just ask Mike, who hates blue cheese but happily ate these crackers and was none the wiser until I informed him of the ingredients). They are just the kind of thing that I would want to crumble into a big bowl of tomato soup on a cold winter night.

Irish Blue Crackers (from Nigella Lawson's How To Be A Domestic Goddess: Baking and The Art of Comfort Cooking)


OK, so I really liked these crackers and so did Butch, but then my sisters tasted them and were not huge fans. But they are kind of fussy individuals so I’m not going to take their opinion as a general consensus. So if you try these will you do me a favor and let me know if you like them? I want to know if they really are gross and maybe I just love them in the same way that a mother loves an ugly baby.


3/4 cup cashel blue or other blue cheese, crumbled
scant 1/2 cup butter, softened
1 large egg yolk
3/4 cup all-purpose flour
1/4 cup blue cornmeal (I just used yellow. According to Nigella you can just use all flour)
pinch of salt
1 beaten egg for glazing (optional)

1) Mix the cheese, butter and egg yolk together.
2) Work in the cornmeal, flour, and salt until a soft dough forms.
3) Shape into a fat disc and wrap in plastic wrap. Refrigerate for 30 minutes.
4) Roll dough out on a floured surface to about 1/4 inch thick.
5) Cut into desired shapes (I used hearts because valentine's day is coming up) and place on a parchment paper-lined cookie sheet. Brush with egg glaze, if desired.
6) Bake at 400 for 10-15 minutes, until center is puffed and edges are crispy.

Friday, February 4, 2011

Chicken Tikka Masala and Naan

I’ve been fascinated by Indian culture for just about as long as I can remember. Granted, this fascination didn’t exactly come out of nowhere or result from reading a lot of Rudyard Kipling. See, when we first came to the U.S. my parents were pretty involved in the Hare Krishna movement, so some of my first memories involve colorful events at the Hare Krishna temple in Boston, where I was surrounded by a sea of saris (how do you like that alliteration?), lively music, and bright flower petals.

Although my parents eventually joined the LDS church and moved our family to Utah, a bit of that devotion to the far East still remained. My dad keeps a poster of yoga asanas hanging on the wall of his study and books like the Bhagavad Gita and Autobiography of a Yogi sit alongside his copies of The Book of Mormon and Teachings of the Prophet Joseph Smith, my sister and I still like to bust out the old vhs tape of Sita’s Wedding-- a bollywood classic and our favorite movie when we were kids-- to drool over the gorgeous costumes and music, and many of the wooden spoons in my parents’ kitchen are stained yellow with tumeric, a colorful spice used in Indian cooking.

Most of the Indian food my mom cooked was simple, vegetarian fare. Things like a potato and spinach curry that she called sabji, or a bright yellow rice dish with potatoes, cauliflower, and tomatoes that didn’t really have a name, at least not one I can recall at the moment. So I didn’t encounter rich dishes like this tikka masala or vegetable coconut kurma (my favorite) until I grew older and started venturing out to Indian restaurants, but rest assured that I loved them all at first bite.

Chicken tikka masala consists of chicken marinated in yogurt and spices, then grilled and served in a spicy tomato cream sauce. This version, though it might not be the most authentic recipe out there, tastes pretty darn close to the tikka masala I’ve had at my favorite Indian restaurants. Served with some basmati rice* and naan, it brought a welcome flair to our dinner table.

Chicken Tikka Masala (adapted from allrecipes.com)


When I went to make this recipe I found a note that I had previously made to double the sauce. I followed that instruction this time around but found that it was a little overkill. If you like plenty of sauce to soak up the rice and dip your naan in, I would say do about one and a half times the sauce proportions listed below.

Oh, and this isn't traditional but I added some frozen peas just because I had them and felt like it.

Marinade:
1 cup yogurt
1 tablespoon lemon juice
2 teaspoons ground cumin
1 teaspoon ground cinnamon
2 teaspoons cayenne pepper
2 teaspoons freshly ground black pepper
1 tablespoon minced fresh ginger
1 teaspoon salt
3 boneless skinless chicken breasts, cut into bite-size pieces
4 long skewers

Sauce:
1 tablespoon butter
1 clove garlic, minced
1 jalapeno pepper, finely chopped
2 teaspoons ground cumin
2 teaspoons paprika
1 teaspoon salt, or to taste
1 (8 ounce) can tomato sauce
1 cup heavy cream
1/4 cup chopped fresh cilantro

1) In a large bowl, combine yogurt, lemon juice, 2 teaspoons cumin, cinnamon, cayenne, black pepper, ginger, and 1 teaspoons salt. Stir in chicken, cover, and refrigerate for 1 hour.
2) Preheat a grill for high heat. Lightly oil the grill grate. Thread chicken onto skewers, and discard marinade. Grill until juices run clear, about 5 minutes on each side (Both times I’ve made this I haven’t wanted to use my grill so I just put the chicken on a wire rack on top of a baking sheet and baked it at 375 for about 15 minutes).
3) Melt butter in a large heavy skillet over medium heat. Saute garlic and jalapeno for 1 minute. Season with 2 teaspoons cumin, paprika, and 1 teaspoon salt. Stir in tomato sauce and cream.
4)Simmer on low heat until sauce thickens, about 20 minutes. Add grilled chicken, and simmer for 10 minutes. Stir in frozen peas (if using). Transfer to a serving platter, and garnish with fresh cilantro.

Naan (from food.com)

I was so excited to make this after seeing how simple this recipe was and what rave reviews it was getting. When mine turned out heavy and didn’t puff up too much, I immediately went to look for some kind of user error. Sure enough, my baking powder expired a year ago. So I’m going to go ahead and recommend this recipe anyway, since it seemed to work out just fine for 130 other people, who I’m assuming didn’t use old baking powder.

4 cups flour
1 teaspoon baking powder
1 teaspoon salt
2 cups plain low-fat yogurt

1) Mix together flour, baking powder and salt.
2) Stir in the yogurt till the dough is too stiff for a spoon, then knead it in the bowl till it holds together well, adding more flour if necessary.
3) Turn it out on a floured surface and continue kneading for about 5 minutes till the dough feels smooth and elastic.
4) Form the dough into a ball and put it in an oiled bowl, covered with a towel, to rest for an hour or longer.
5) Take the dough out and cut it into 10 equal pieces. Form each into a ball and press the balls flat into round discs.
6) Heat a large frying pan or griddle, either seasoned cast iron or a good non-stick finish.
7) Heat your oven to about 500 and have the broiler on (this is how the original recipe states it - I know with my oven it's either 500 degree oven OR the broiler, but you get the idea.
8) Take 1 piece of dough at a time and roll it out on a floured surface till it is about 8-10 inches across and less than 1/4 inch thick.
9) Lay it on the hot griddle and cook it over a medium heat for 4-5 minutes (I don't think mine took that long).
10) It will puff up in places or all over, and there will be some blackish-brown spots on the bottom.
11) Slide a spatula under the naan and transfer it to the oven, directly onto the rack, for a minute or two, just till it finishes puffing up into a balloon and begins to color lightly on top.
12) Remove naan from the oven and brush it lightly with melted butter if you like.
13) Continue this way with all the dough, stacking the breads into a napkin-lined basket.
14) Serve the breads hot, fresh from the oven, or let them cool and wrap them up.
15) To reheat, wrap them in aluminum foil, in packets of 4 or 5 breads and put them in a 400 degree oven for 10-15 minutes.

*Basmati rice is a long, thin rice that cooks up very dry and light. You can buy it at Asian markets and I believe in bulk at costco. I bought some from the bulk section of Whole Foods and it wasn't that great. Usually I just steal it from my parents' kitchen.

Thursday, February 3, 2011

Not a recipe, but still worth your time

I posted a link to this article on my facebook page this morning, but thought I would share it here as well:

http://opinionator.blogs.nytimes.com/2011/02/01/a-food-manifesto-for-the-future/?WT.mc_id=OP-SM-E-FB-SM-LIN-AFM-020311-NYT-NA&WT.mc_ev=click

After doing a lot of reading on this subject for the past year and a half, I can say that I agree wholeheartedly with the points made in this article and hope that these goals can be accomplished in my lifetime. Many of the current methods used to produce food in our country are toxic for both our bodies and the environment and this issue really needs to be a matter of national concern rather than just some fringe movement dismissed as something only elitists and hippies care about.

To show just how messed up things are these days, I thought I would share an excerpt from an email I recently received from Christiansen Farm, a local farm from which Mike and I buy our meat. This enterprise is a truly admirable one in which animals are raised the way they should be. They sell top-quality beef, pork, and, until recently, chicken:

"...our plans [to sell chickens in 2011] have recently been squashed by the Utah Department of Agriculture and Food (UDAF). Last winter we spoke extensively with the inspectors to find out how we could legally and safely process chickens for our customers. They helped us get set up under an exemption that allowed small farms to process their own poultry. Under this exemption, we had a young aspiring butcher process our chickens outdoors on our property following safety guidelines set forth by the department. This has worked wonderfully all year. Recently, we received a call from the department informing us that we would now have to take the live chickens to each of our customer's private property and process them on their property in order to continue under this small farm exemption. We protested their request stating that not only would it be economically unfeasible, less sanitary, and ridiculously time consuming, but that no city would allow for processing poultry in people's driveways. However, they refused to budge. Our only alternative is a costly one, which would require us to build a full blown processing facility. Even if we were able to justify such an investment the UDAF informed us that there isn't an inspector in Utah who is even certified to inspect our facility. So, for now poultry is on hold for 2011 as we explore our options.

So apparently the chicken sold in grocery stores--which comes from animals who stand in their own crap all day and get pumped full of all kinds of crazy drugs, then slaughtered using methods that are both inhumane and often unsanitary--are just fine to eat, yet chickens raised and butchered using traditional methods that farmers employed for hundreds of years are deemed unfit for consumption? Ethical issues aside, the sheer stupidity of this frustrates me.

Anyway, I hope you all enjoyed my moment on the soapbox. Tomorrow I'll be back to normal with a recipe for some delicious Indian food.

Wednesday, January 26, 2011

Curried Lentil Soup

Two soup recipe posts in one week? It must be January. But while the broccoli cheddar soup I told you about on Monday is more of a rich indulgence, this lentil one lies on the opposite end of the soup spectrum. I guess the word I can best use to describe it is "wholesome."

I've actually had lentil soup on the brain for the past couple of months and have even gone so far as to bookmark about five or so recipes with every intention of making them. But for some reason it wasn't until I read Molly Wizenburg's column in the December issue of Bon Appetit that I finally got around to it. Maybe I ended up making this version because her description of the soup was so mouthwatering, or maybe it was just because I had all the ingredients on hand. Either way, I'm glad I did it because this soup lived up to every letter of Molly's beautiful description. I think it's going to become a winter staple around these parts.

Curried Lentil Soup (from bonappetit.com)

One quick note about this recipe: use a curry powder you like. I used the generic yellow stuff simply marked "curry powder" because I had it sitting in my cupboard, then added some cumin and cayenne pepper to give it more kick, but I really wish I had used something with a little more smoky depth to it. It would have made this soup even better.


(Image via bonappetit.com)

3 tablespoons olive oil, divided
1 medium onion, chopped
1 medium carrot, finely chopped
2 large garlic cloves, chopped, divided
2 tablespoons (or more) curry powder
1 cup French green lentils (I found mine in the bulk section of Whole Foods)
4 1/4 cups (or more) water, divided
1 15- to 16-ounce can chickpeas (garbanzo beans), drained, rinsed
1 tablespoon fresh lemon juice
2 tablespoons (1/4 stick) butter
2 green onions, thinly sliced
1 lemon, cut into 6 wedges

1) Heat 1 tablespoon olive oil in heavy large pot over medium heat. Add onion and carrot; sprinkle with salt and pepper. Cook until onion is translucent, stirring occasionally, about 4 minutes.
2) Add half of chopped garlic; stir until vegetables are soft but not brown, about 4 minutes longer.
3) Add 2 tablespoons curry powder; stir until fragrant, about 1 minute.
4) Add lentils and 4 cups water. Sprinkle with salt and pepper.
5) Increase heat and bring to boil. Reduce heat to medium; simmer until lentils are tender, about 30 minutes.
6) Meanwhile, puree chickpeas, lemon juice, 1/4 cup water, remaining 2 tablespoons olive oil, and remaining garlic in processor.
7) Add chickpea puree and butter to lentil soup. Season to taste with salt, pepper, and additional curry powder, if desired. Add water by 1/4 cupfuls to thin to desired consistency.

Monday, January 24, 2011

Broccoli and Cheddar Chowder

Doesn’t that name sound a helluva lot more appetizing than just plain old broccoli cheese? Actually the real name of this soup, found in The Gourmet Cookbook, is Broccoli, Red Pepper, and Cheddar Chowder. But I left out the red pepper because A) I didn’t really like the sound of it in this soup and B) red peppers aren’t in season right now and therefore too expensive for a gal on a budget.

Without the red pepper, though, this recipe is essentially Gourmet’s take on classic broccoli cheese soup, a dish that I’ve always had mixed feelings about. At its best, broccoli cheese soup is the epitome of winter comfort food—creamy and rich but chock full of wholesome little broccoli chunks. At its worst, it’s a thick, velveeta-filled sludge of mushy vegetables.

I was intrigued by this particular recipe when I saw that it used potato to give the soup some body rather than just the standard roux or unholy amounts of cheese. I made it for dinner on a cold winter’s night when we were feeling indulgent and, to be totally honest, wasn’t overly impressed. The soup was good, it was just a little bit on the thin side and had an almost sour aftertaste to it that I couldn’t quite pinpoint.

But then a miraculous thing happened. When I heated up the leftover soup for lunch at work the next day, I noticed that not only had the consistency thickened up a bit, but the strange sour taste from the night before had disappeared completely and the flavor of the soup was incredible. So from now on, I’ll be making this soup the day before I plan to eat it. Kind of a pain but the best things in life, they say, are worth waiting for.


Broccoli and Cheddar Chowder (Adapted from The Gourmet Cookbook;also found here)

1 small head broccoli (1/2 pound)
1 large boiling potato (1/2 pound)
1 large onion, chopped
l large garlic clove, finely chopped
2 tablespoons unsalted butter
1 teaspoon ground cumin
1 teaspoon salt
1/4 teaspoon black pepper
1/2 teaspoon dry mustard
2 tablespoons all-purpose flour
3/4 cup heavy cream
1 1/2 cups (6 oz) sharp Cheddar, coarsely grated (I used mild)

1) Discard tough lower third of broccoli stem. Peel remaining stem and finely chop. Cut remaining broccoli into very small (1-inch) florets. Cook florets in a large pot of boiling salted water until just tender, 2 to 3 minutes.
2) Transfer with a slotted spoon to a bowl of ice water to stop cooking, then drain. Reserve 3 cups cooking water for chowder.
3) Peel potato and cut into 1/2-inch cubes. Cook potato, onion, broccoli stems, and garlic in butter in a 3- to 4-quart heavy pot over moderate heat, stirring occasionally, until onion is softened, 8 to 10 minutes.
4) Add cumin, salt, pepper, and mustard and cook, stirring, 1 minute. Add flour and cook, stirring, 2 minutes.
5) Add reserved cooking water and simmer (partially covered), stirring occasionally, until potatoes are tender, about 10 minutes. Stir in cream and cheese and cook, stirring, until cheese is melted, then season with salt and pepper.
6) Purée about 2 cups of chowder in a blender until smooth (use caution when blending hot liquids) and return to pot. Add florets and cook over moderate heat, stirring occasionally, until heated through, about 2 minutes.