Sunday, October 25, 2009

One Cake, Three Ways (For Ashlee)

Most of the cake I truly love tends to fall into the non-traditional camp. I like rich flourless cakes (more of a brownie feel) or banana bread-type loaf cakes more than I do the layers-with-frosting kind of thing. That said, there are times when only a traditional cake will do. When those occasions arise, I immediately reach for this recipe. It was given to me by my best friend’s mom, who is a bona fide domestic diva and a second mother to me in many ways.

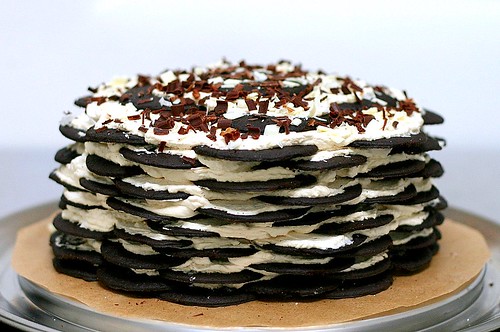
Yes, this cake is ridiculously fattening. Yes, it uses ultra-processed ingredients. Both of these things might have stopped me from making it had I not tasted the finished product first, but I’m glad I did because this cake is delicious. Moist, flavorful, and everything a cake should be; none of that dry, crumbly texture that so many cakes fall prey to.

This recipe started life as a chocolate cake, but the method outlined in it can be used to create many different flavors and types of cake. I’ve listed 2 variations below the chocolate one, and I’m sure there are many more that you could try.

DeAnn’s Chocolate Cake

1 Devil’s Food cake mix (Duncan Hines brand is best)
1 small box instant chocolate pudding mix
1 cup sour cream
4 eggs
½ cup vegetable oil
½ cup water

1. Using either a stand or hand-held electric mixer, mix all ingredients on medium speed for 3 minutes
2. Pour batter into two 8'' or 9” greased pans
3. Bake at 350 for about 27 minutes, or until an inserted toothpick comes out clean
4. When completely cooled, frost with chocolate frosting (recipe below)

Frosting:
4 cups sifted powdered sugar
1/2 cup cocoa
1 stick butter, at room temperature
enough milk or cream to make spreading consistency

Beat all ingredients except milk on low speed until combined, then keep beating and add milk slowly until desired spreading consistency is achieved.

Almond Poppy Seed Bundt Cake


Same ingredients as chocolate cake except:
-Use yellow cake mix instead of devil’s food
-Use french vanilla pudding instead of chocolate
-Add 2 tablespoons each of poppy seeds and pure almond extract to the batter.

1) Mix on medium speed for 3 minutes
2) Pour into a well-greased bundt pan
3) Bake at 350 for 40-50 minutes, or until tester comes out clean.
4) When completely cooled, glaze with the following:

Glaze:
2 cups sifted powdered sugar
2 tablespoons milk
1-2 teaspoons pure almond extract

1) Whisk powdered sugar and milk together until smooth and of pouring consistency.
2) Add 1 tsp. almond extract and mix well.
3) If glaze is too thick, thin using small amounts of milk until correct consistency is achieved.
4) Taste and add more almond extract if needed for flavor.

Red Velvet Cake
-Same ingredients and directions as chocolate cake except instead of devil’s food use red velvet cake mix
-I have made this both as a layer cake and a bundt cake, so follow the baking times for whichever method you like to use.
-If making a bundt, I like to stir a handful or two of semi-sweet chocolate chips into the batter
-I always frost this cake with cream cheese frosting:

Cream Cheese Frosting:

1 stick butter, softened
8 oz. cream cheese, softened
2-4 cups sifted powdered sugar (depending on how sweet and thick you want the frosting to be- taste as you go)
2 tsp. vanilla

1) Beat butter and cream cheese together
2) Add sugar and vanilla and beat until of spreading consistency

If you are making a layer cake, frost as usual, but if you are making a bundt I suggest putting the frosting in a ziploc bag (or legit pastry bag if you have one) and letting it firm up in the fridge for a while, then cutting the tip off the ziploc bag and piping the frosting on the sides of the bundt.

Thursday, October 22, 2009

Waffles with Caramel Apple Syrup

I am a big fan of the “Breakfast for Dinner” concept. Mostly because I don’t have the time to make eggs, pancakes, or any of that other stuff in the morning, but also because I think there is a certain sense of whimsy in having French toast or egg-in-a-hole as your evening meal. It makes life seem a little less hectic and stressful, and a little more like the days of slumber parties and Saturday morning cartoons. Plus any excuse to eat things containing high amounts of sugar and call it a meal is just fine by me.

A while back I found this recipe on a blog called The Jet Set. I instantly knew that it would make a perfect Breakfast for Dinner, and I was right. The caramel apple syrup was full of flavor without being overly sweet, and it was a great way to use up some old apples I had sitting in my fridge. Besides being a topping for waffles I think this syrup would work well as a crepe filler or maybe just poured on top of some vanilla ice cream for dessert. I am still looking for a perfect waffle recipe, and, although these yeasted waffles were very good, I would like to experiment with some others so if you have a great one please send it my way.

I served these suckers topped with some freshly whipped cream, alongside some crisp bacon and orange juice. I suggest you take advantage of the dwindling days of apple season and do the same.


(I forgot to take a picture until I was almost done eating, plus it was taken with my ghetto camera phone. Sorry about that)

Caramel Apple Syrup
4-5 medium tart apples (the flavor of this syrup is going to depend almost entirely on the quality of apples you use, so choose wisely)
1/2 tsp salt
1/2 cup butter
1 cup brown sugar
1/4 cup maple syrup

1.Peel, core, and dice the apples.
2. In a large saucepan heat 1/4 cup butter over medium high heat until melted. Add apples.
3. Sprinkle with salt and a couple tablespoons of the brown sugar.
4. Turn the heat to high and stir while apples caramelize, about 4-5 minutes.
5. As the apples brown, turn down the heat to medium to prevent scorching. Add the remaining butter and sugar.
6. Reduce for another 3 minutes, until sugar is melted, stirring often (I let mine reduce a little longer, about 5 minutes). Add syrup and serve over waffles or pancakes.

Yeasted Waffles:
1 3/4 Milk
1/2 cup butter
2 cups white flour*
1 Tbl sugar
1/2 tsp salt
1 1/2 tsp yeast
2 eggs
1 tsp vanilla
1. Heat the milk up until hot, but not boiling.
2. Add the butter to the milk and melt. Cool slightly.
3. Beat the eggs lightly and then add to the milk mixture, along with the vanilla.
4. Put all the dry ingredients in a bowl and whisk to combine. Add the wet ingredients and stir until combined, a few lumps are OK.
5. Cover with plastic wrap and put it in the fridge for 12-24 hours.
6. Heat your waffle iron a good 10-15 minutes before you use it. Whisk your batter and ladle it into the iron. Cook until golden. Serve immediately.
*The recipe originally calls for 1 cup wheat flour, 1 cup white, but white is all I had on hand the night I made these.

Monday, October 19, 2009

Chicken Taco Soup

I was once looking through a cookbook by Ina Garten in which there was a recipe for chicken breasts stuffed with goat cheese and fresh basil. She described this dish as her “easy dinner”- what she makes on those nights that she doesn’t feel like cooking.

Can I even tell you how much I would like to live in a world where my “easy dinner” consisted of chicken with goat cheese and basil? Pretty sure if I ever made that for dinner Mike would run to the police reporting spousal abuse. And, as much as I like cooking, stuffing and baking chicken just doesn’t sound that appealing on nights when I feel like being lazy.

In this age of modern technology, my definition of an easy dinner is one that is ready right when you walk in the door from work, creates minimal dirty dishes, and is a complete meal in itself. The soup recipe below meets all those requirements, plus it is relatively healthy and uses simple ingredients. It requires some assembly in the morning, but all you have to do before eating is shred the chicken and grate some cheddar cheese. Perfect for those chilly nights you would rather spend curled up on the couch than standing over a hot stove.

Chicken Taco Soup
(Adapted from the original listing at allrecipes.com)

1 (16 ounce) can chili beans*, undrained
1 (15 ounce) can black beans
1 1/2 cups sweet frozen corn
8 ounces (1 cup) tomato sauce
1 1/2 cups water
2 (10 ounce) cans diced tomatoes with green chilies, undrained (I use the mild version of Rotel brand, but use the regular if you like a little more heat).
1 (1.25 ounce) package taco seasoning
3 whole skinless, boneless chicken breasts (I only use 2)
shredded Cheddar cheese (optional)
sour cream (optional)
crushed tortilla chips (optional)

1) Place chili beans, black beans, corn, tomato sauce, water, and diced tomatoes in a slow cooker. Add taco seasoning, and stir to blend. Lay chicken breasts on top of the mixture, pressing down slightly until just covered by the other ingredients.
2) Cover and cook in slow cooker on low heat for 5 hours.
3) Remove chicken breasts from the soup, and allow to cool long enough to be handled. Stir the shredded chicken back into the soup, and continue cooking for 2 hours. (Since I work all day, I just put frozen chicken in the crock pot for about 8 hours, then shred it and let the soup cook for only as long as it takes to get the table set- I don’t think it makes a huge difference either way).

Serve topped with shredded Cheddar cheese, sour cream, and crushed tortilla chips, if desired.

*You want pinto beans in a spicy sauce, not a can of chili with ground beef in it. I only include this note because Mike has called me from the grocery store before to clarify this distinction.

Monday, October 12, 2009

Peach Cobbler

I have mixed feelings about fruit desserts. I love fruit pies, crisps, cobblers and the like, but I just can't bring myself to make them most of the time. Fresh fruit(when it's in season) is so good on its own that adding the extra sugar and fat seems downright wasteful. In my book, the more mediocre and readily-available fruits like apples are fine to tamper with, but when it comes to sweet, delicate specimens such as peaches, nectarines, berries, etc. my policy has always been to leave well enough alone.

As you can tell from the title of this post, I strayed from that policy a couple of weeks ago by baking peach cobbler. My excuse is that my in-laws have a peach tree and were kind enough to give us a case of them one evening. Mike and I feasted on fresh peaches for the next few days, but it soon became apparent that we weren't going to finish them before they spoiled: a perfect reason to try out a peach cobbler recipe.

This cobbler is a very traditional one- a sweet biscuit-like topping with fresh peaches bubbling in their juices underneath. Mike prefers the made-with-a-cake-mix-and-sprite take on peach cobbler that is usually made in a dutch oven, but I find it to be way too sweet and overpowering for my taste. This version is more complex and lets the peaches dominate the flavor of the dessert.

Peach Cobbler

Ingredients:
8 large peaches* (I think I only used about 5 or 6)
1 cup flour
1 cup sugar
1/2 teaspoon salt
1/4 cup butter, softened
1 egg
1 teaspoon baking powder

1)Grease 8'' square baking pan
2)Peel and slice peaches into pan
3)Combine remaining ingredients to make a dough (I used the paddle attachment on my Kitchen Aid, but you could use a hand mixer or even just a spoon)
4) Crumble dough on top of peaches
5) Bake at 350 degrees for 30 minutes (mine took a little longer- more like 40 or 45 minutes- but that might be because my oven is a piece of crap).

Serve warm with vanilla ice cream.

*If your peaches aren't terribly sweet (mine weren't) toss them with a tablespoon or two of sugar before putting the dough on top.

Wednesday, October 7, 2009

Baked Potato Soup (Another Re-Post)

Here is the recipe for the soup I made last night. It is adapted only slightly from the Ivory Favorites cookbook (a fabulous cookbook available through Make-A-Wish foundation). It’s simple, easy to make, and oh-so-very-comforting to eat. After the crazy day I had at work yesterday, this soup made me feel like a new woman.

Baked Potato Soup

Ingredients:
3 Tablespoons Butter
1 cup finely chopped onion
2 Tablespoons flour
14.5 oz chicken broth (or enough to barely cover the potatoes- I usually end up using about 20 oz. or more. Oh, and pacific organic chicken broth is sold at Costco for a steal of a deal).
4 medium-sized baking potatoes, cut into ½ inch cubes (I only use 2 of the huge mutant Costco ones)
1 teaspoon basil
½ teaspoon salt
½ teaspoon garlic salt
¼ teaspoon black pepper
¼ teaspoon white pepper
1 cup half and half

Optional garnishes:
Green onions or chives
Cheddar cheese
Bacon bits

1) Melt butter over medium heat in a 2-quart saucepan
2) Add onion and saute for 1-2 minutes
3) Sprinkle flour over onions and saute for 5 minutes
4) Pour chicken broth in and stir (I usually add a cup or so at this point just to “deglaze” the pan and wait until I add the potatoes to pour in the rest).
5) Add potatoes and spices
6) Bring mixture to a boil, then simmer on low for 20-40 minutes, stirring occasionally. (The recipe says to cook the mixture for 20 minutes, but I’ve found that I like to let the potatoes cook until they are practically falling apart and their starchiness has thickened the broth up quite a bit. I usually take a potato masher and smash a few of them up in the pot when they’ve finished cooking to make the soup even more thick. So, if you’d like the soup to be more of a liquid base with distinct potato chunks, cook it for the 20 minutes. Otherwise, let it cook longer).
7) Stir in half and half. Heat through.
8) Garnish with what is listed above, or any other baked potato toppings you like.

I like to serve this with a simple green salad and some crusty bread or rolls (if you can handle the starch overload that is).

Molten Chocolate Babycakes (Re-Post)

This is a recipe I randomly posted to my regular blog, but I thought I would put it over here as well, since I like to think of this blog as an online recipe file of sorts.

This recipe comes from the cookbook How to be a Domestic Goddess: Baking and the Art of Comfort Cooking by Nigella Lawson, and, as the name implies, produces individually portioned chocolate cakes that are runny in the middle. Ice cream on the side is an absolute necessity.

Molten Chocolate Babycakes


scant 1/4 cup soft unsalted butter, plus more for greasing
12 ounces best bittersweet chocolate (I stock up when ghirardelli is on sale)
1/2 cup sugar
4 large eggs, beaten with a pinch of salt
1 teaspoon vanilla extract
1/3 cup all-purpose flour
6 individual 6-ounce custard cups
baking parchment

1) Preheat the oven to 400 degrees. Put in a baking sheet at the same time.
2) Lay 3 of the custard cups on a sheet of doubled baking parchment. Trace around them, then cut out the discs as marked and press into the base of the greased cups.
3) Melt the chocolate and let it cool slightly.
4) Cream together the butter and sugar, then gradually beat in the eggs and salt, then the vanilla.
5) Add the flour, and when it is all blended add the melted chocolate and blend to a smooth batter.
6) Divide the batter among the 6 cups and place them on the baking sheet in the oven.
7) Bake for 10-12 minutes (12 minutes if you make the batter up ahead of time and refrigerate it in the cups).
8) Tip each babycake out onto a small plate or shallow bowl. Add a big scoop of vanilla ice cream. Serve immediately.

Note: You can make this batter up ahead of time and refrigerate it in the custard cups. I have even made them up a day or so in advance and they came out just fine. Also, if you don’t need to make all six, the recipe works just fine when halved.

Monday, October 5, 2009

Chocolate Icebox Cake

Last fall for my little sister’s birthday I baked a decadent flourless chocolate hazelnut cake. In order to make it I had to peel and grind fresh hazelnuts, dirty every mixing bowl I own, and resist the urge to scarf down the jar of nutella the recipe called for. In short, it was a royal pain in the butt.

I also had a few late-autumn apples going bad in my fridge that day, so I decided to throw together an apple pie for some variety. And, sure enough, the time-consuming labor of love chocolate cake was largely ignored by my family, who instead devoured the apple pie like it was their last meal on earth.

I like to pride myself on learning from my mistakes, so when I was asked to make dessert for my dad’s birthday luncheon on Sunday I kept it simple and made apple pie the star of the show. Only I have never been one to resist the urge to experiment, so I also took this as an opportunity to make a scaled-down version of the Chocolate Icebox Cake found on the Smitten Kitchen site.

Guess which one my family went nuts for? Yep, once again the “afterthought” recipe stole the show. Only this time around I was not bitter, since I was also overjoyed at discovering such an easy recipe. This cake requires no baking, and would therefore be perfect for those hot summer days when you want a decadent dessert but the thought of turning on the oven sounds about as appealing as climbing into a hot tub.

When I was making this recipe, I really wasn’t sure what the final outcome was going to be. I could tell what both the wafers and whipped cream tasted like individually, but didn’t know what a night together in the fridge would do for them. The result was better than I had even imagined. The cream softened up the wafers quite nicely and made them almost cakelike, with barely-there layers of sweet cold cream in the middle. It was like eating a classed-up version of an oreo; not distinctly chocolatey or overly sweet, but downright delicious.

Here is the recipe (I halved the ingredients when I made it, and used the method described below to create six layers instead of eleven).

Chocolate Icebox Cake:

3 cups heavy cream
3 tablespoons sugar
1 tablespoon vanilla extract
2 (9-ounce) packages Nabisco chocolate wafer cookies
Unsweetened cocoa (or chocolate shavings)

1) In a large bowl, beat cream, sugar and vanilla with an electric mixer on high speed until soft peaks form.
2) On a flat serving plate, arrange 7 cookies side by side in a circle, keeping 1 cookie in the center.
3) Spread with 1/2 cup whipped cream, making a 7-inch circle. Repeat with remaining cookies and cream, making 11 layers of cookies and ending with a layer of cream (there will be a few cookies left over). Cover with plastic wrap and refrigerate overnight.

To serve, dust top lightly with cocoa powder or chocolate shavings.

(Image courtesy of Smitten Kitchen).